No Jam This Time
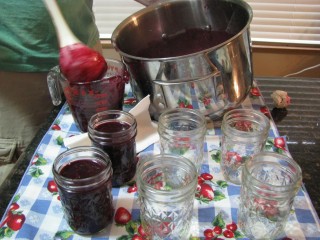
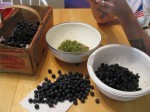
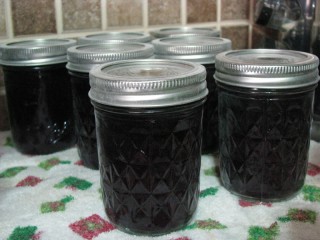 Well… I take that back. Ok, so we did make some no-sugar-added blueberry jam this weekend to complete our jammin’ adventure with 24 jars! 10 jars of peach, 7 jars of grape, and 7 jars of blueberry. That means plenty to send off to family and friends as gifts this season and plenty leftover for me to pair with peanut butter for lunch.
It’s getting chilly out and I can smell Fall again. This normally wouldn’t be so extraordinary except I’ve lived without a true Fall for the past three years. I had almost forgotten my favorite season; Calgary’s summers usually crash landed right into Winter, and I realized this past week that I really missed the season of cooler sweatshirt-and-long-sleeved weather with beautifully changing golden and red leaves everywhere. That little nip in the air along with a fresh hockey and football season has brought back one of my favorite things about Fall; cuddling on the couch watching [insert hockey or football game here] while I knit. I recently have had a lot of Cthulhu Toque orders crop up, and I realized that it’s probably due to the cooler weather rolling in. It’s about time to start thinking about toques and scarves and all of that gets me energized to pull out the yarn and needles (or hooks) and get to work.
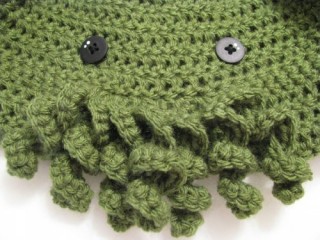 Speaking of my Cthulhu Toques, I’ve got plans in the making for a toddler sized (due mostly to the several requests I’ve received) version as well as a few other little surprises. I just hope I can find enough time in the day to make and do all of the little creative plans I’ve got in mind AND get a head start on my Christmas gift knitting. Stay tuned!
Have you noticed the cooler air? Don’t you think your head would be a heckuva lot warmer if you were being snuggled by the tentacles of the mighty Cthulhu?! Of course you do. Be sure to check out my Etsy shop and get your awesome Cthulhu Toque before the weather gets too cold! Are you a crocheter? You can also just purchase the pattern…
Rawr!
We Be Jammin' (Again)
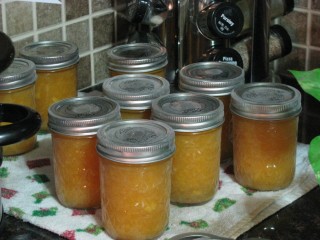 Take Two! I have a few days off this week so today Lucas and I used this gloriously dreary day (outside) to spend the afternoon inside canning. (AKA finish Christmas presents.)
This go around we decided to try making a peach jam. A few weeks back when we made concord grape jam we used fresh grapes from my grandma’s garden. Since we didn’t know anyone who had fresh peaches in the area, we just picked up some *gasp* frozen unsweetened 100% peaches at the grocery store. Yes, we’re lame I guess, but we were itching to can more jam and the produce section wasn’t looking too… healthy today.
Once again we used the SUREJELL brand of low sugar/no sugar pectin and combined the recipes and tips we found on various websites online to come up with what we thought would make the best peach jam. We used four pounds of frozen peaches, which we thawed completely, and 2 cups of white grape peach juice for sweetener instead of sugar. After a little help from the food processor and some hand blender thing we found in my mom’s cabinet, we threw all of the peach goop and juice onto the stove to boil. Once we got a rolling boil going, we added in the pectin and 1/4 cup of Splenda. That really was it. So far so good and all 10 jars we managed to get from it sealed properly. Now we’ve got 17 jars of fresh jam between the grape and peach to give away as part of our Christmas gift packages we’re doing for family and friends this year. Awesome!
Also today I finished yet another knitted object for my upcoming nephew — can you believe that he’s due at the end of this month?! In true fall style I whipped up a pumpkin toque and figure that even if he’s born after Halloween that the pumpkin would be an appropriate icon for the in-between Halloween and Thanksgiving period. I hear my brother and sister-in-law aren’t big fans of hats that look like vegetables, fruits, or flowers… too bad for them, eh? Since baby William isn’t here yet, I used (big surprise) Oliver and Winston as models. I think the toque turned out pretty darn cute, don’t you?
We Be Jammin'
Finally, an update! A few weeks ago, my grandma convinced Lucas and I that we needed to try canning. Her grapes ripened well and yesterday afternoon we went over and took a nice hefty load of concords off her hands. She ensured us that it would be easy, and after a little pre-canning prep reading online, the whole process really was easy. And dare I say… fun? Looks like we’ll be gifting some jam this holiday season.
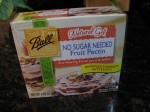
With a diabetic father and sister-in-law, a lot of us in the family watch our sugar intake. My grandma makes jam complete with sugar, but I was determined to make some lower sugar jam so that more of the family could enjoy it. I picked up some SUREJELL brand for Less or No Sugar Needed recipes pectin at Meijer and started looking around for a good recipe. Most recipes required a lot of sugar, and I found out quickly that low or no sugar recipes require some changes to the basic jam recipe. After all of my research on which recipe to use, I felt pretty confident with what we put together; a combination of several low sugar jam recipes to align with the instructions that came with the pectin. Here’s what we came up with:
 Lucas and Lesley’s Low Sugar Concord Grape Jam Recipe
Ingredients
7 cups prepared fruit (buy about 5 lb. fully ripe Concord grapes)
1 cup no sugar added white grape juice
1/4 cup Splenda
1 box SUREJELL For Less or No Sugar Needed Recipes Premium Fruit Pectin
8-12 (8 oz.) canning jars with accompanying 2-piece lids*
*note: if re-using jars from previous canning sessions, it’s recommended to always buy brand new lids. (Just the flat lid part only, not the screw bands.) You can easily purchase these separately at most grocery stores or other big box stores like Meijer or Wal-Mart.
Directions
Throw your jars and 2-part lids into the dishwasher to wash them thoroughly. Be sure to turn on a sani-dry or drying process to the cycle; this ensures the jars are nice and hot and dry at the end, which is suitable for hot jam. The jars need to be hot when you pour the hot jam into them so that they don’t break from the temperature difference. Using your dishwasher (if you have one) eliminates the need for hot water to keep the jars warm in while you prepare the jam. Alternately you can wash the jars and lids by hand with soap and water and then keep them in warm (not boiling) water until you’re ready to fill them. While you should keep the jars and flat lids warm until use, keep the screw bands separate and cool to make closing up your hot jars later a little easier. You don’t want the water to boil because boiling the flat lid before using it to create a seal may warp them and not allow them to seal properly later.
Slip the skins from the grapes, separating the pulp from the skins. Toss the skins into a food processor and blend; set aside. Combine grape pulp and white grape juice in a saucepan and bring to boil; cover and simmer for 5 minutes. Toss the cooked pulp through a Foley press or run through a sieve to remove the seeds. Now combine the skins and pulp in a big bowl; this is considered “prepared fruit.” Measure exactly 7 cups of prepared fruit into a large 8 quart saucepot and put it back on the heat.
Mix the 1/4 cup of Splenda and pectin in a small bowl. Add it to the fruit in saucepot; stir to mix well. OPTIONALLY you can add 1/2 tsp. of butter to reduce foaming, if you have any foaming. Bring the fruit to a full rolling boil on high heat and boil for 1 minute, stirring constantly. Remove from the heat and skim off any foam if necessary.
The dishwasher cycle should be complete; pull the hot, dry jars from the dishwasher and place on a towel on the counter. Ladle the fruit into the prepared jars, filling to within 1/4 inch of the top. Wipe the jar rims and threads. Cover the jars with the two-piece lids and screw bands tightly. Place the jars on an elevated rack in a giant pot of water on the stove, or in a canner. If you don’t have a rack or canner, you can use extra screw bands or metal cookie cutters and tie them together and use them on the bottom of the pot to elevate your jars. Submerge the jars; the water in the pot must cover the jars by 1 to 2 inches. Add more boiling water if necessary. Cover; bring water to a gentle boil. Let the jars process for 10 minutes in the gently boiling water. Using tongs, remove the jars and place them upright on a towel to cool completely. After the jars cool, check the seals by pressing the middles of the lids with your finger. If the lids spring back, they did not seal properly and you can try again. If you don’t want to try and re-seal, the jam is still perfectly useable, but refrigeration will be required and it won’t have the same shelf life as your properly sealed jars.
About the Sugar
This method only adds around 4 grams of sugar (from the low sugar juice) per jar of jam you make, so it makes ridiculously low sugar grape jam that tastes deliciously fresh, allowing the natural sugars of the grapes to provide all of the flavor. Alternately you can use 1 cup of water in place of the 1 cup of grape juice to eliminate all added sugar, but the juice gives just a hint of sweetness to keep the grapes from being a bit tart without pouring on cup after cup of granulated sugar. The 1/4 cup of Splenda added in with the pectin is negligible and can be omitted completely if you’d prefer.
And there you have it! After the jars cooled and we had checked the seals and found them to be satisfactory, we just let the jars of jam sit, undisturbed, for 12-24 hours. I plan to knit doilies to adorn the jar lids and make pretty little tags for them before we gift them this holiday season. Enjoy, and good luck making jam!
A Little Scrapbooking
*Gasp* I know, I’m scrapbooking again. Don’t worry — the schnauzer schweater is still a work in progress (and thanks to teaching 2nd grade, it gets forgotten from time to time, ha) and I’ll be knitting some more soon, but I thought a little trip down scrapbook lane would be nice so I could update my Family Life 2009 album a bit.
I gotta admit, I simply used some fabulous quick page designs by other digital scrapbooking artists and inserted my photos for the two latest pages, so I didn’t go overboard, but I did use My Memories Suite to create the pages, which always makes me happy. It’s seriously such fabulous software. Have you read my review of it? It’s been awhile since I’ve trumpeted from the roof tops how much I love this program. Want to know how to use quick page design layouts you download on the web within My Memories Suite? It’s super easy; check out my tutorial… My Memories Suite Tutorial 3: Using Quick Pages. It seriously felt so good to rev up My Memories Suite and add a few more pages tonight. I shouldn’t let it go so long between page creations :)
Anyway, first up was a page that pays homage to our epic journey driving from Calgary to Indiana last month when we moved back home. I used Little Boy Blue by Joanne Bain Designs. (Pictured above.) I really felt like the photo of Oliver and Winston peeking their heads out of the Neon with the UHAUL trailer behind captured the trip. The second page was a quick page called All You Need by Krystal Hartley. Because really, all you need is love, and I’m the luckiest girl in all the world to have the love of that handsome man right there in the photo. Aren’t we cute? ;)
Coming up soon is my sister-in-law’s baby shower that I’m hosting, and I’d love to turn the embellishment I created when designing the invitations into a digital scrapbook quick page layout or mini freebie set to give away. I just wish there was more time in the day! I’ve got two weeks to go, and I’ve still got to design and sew a diaper bag for her, too. A few weeks back we went shopping for fabric and she picked out some adorable quilted fabric and described the type of bag she’s looking for. Now it’s just a matter of sitting down and pulling it all together, which sounds easy but I swear time just seems to get by me. I’ll keep you posted and show off some pics as I get going on it.
So that’s it for now! To do list: work on and finish schnauzer sweater, make a little mini kit or quick page of the little boy car embellishment from the baby shower invites, and design and sew a diaper bag! No problem, right? ;) See you soon!
P.s. If you’d like to purchase My Memories Suite at 25% off of the original price, let me help you! And don’t forget to check out all of the My Memories Suite tutorials I’ve created to help you get the most out of the software.
Making a Fashionable (and Crafty) Change
I had a unique opportunity this week that allowed me to participate in crochet and charity at the same time. A friend of mine from high school, Julia Porter, is the Director of Program Expansion for GlamourGals, a non profit organization whose mission is to foster inter-generational relationships between teen girls and elderly women living in senior homes through monthly facials and makeovers. Julia is also a crafty fellow crocheter, and a few months ago she told me about a GlamourGals event coming to Indianapolis and asked if I could come and teach crochet at it. This was a no brainer!
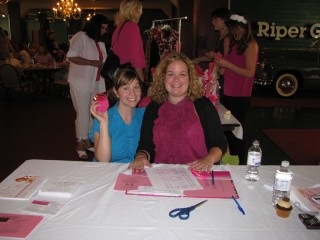
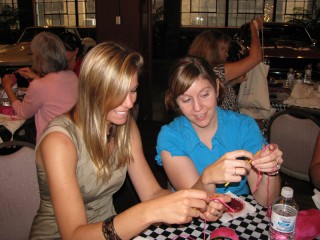
So Thursday night I made a fashionable change by attending and teaching at the Indianapolis Hot Pink Party. The Hot Pink Party is a GlamourGals event that started in New York, where for a small donation/registration fee, you would be taught how to knit or crochet and receive a Lion Brand bag of supplies that would allow you to knit or crochet your very own hot pink scarf, which is a symbol of the awesome that is GlamourGals. The donation goes towards the leadership program for the GG Foundation and you get a night of fun learning a craft with other women also making a fashionable change and you take home a scarf that you made! It was a really inspiring and fantastic event, and I taught crochet at a table with a couple of women who had varying levels of experience crocheting, from none at all to moderately experienced. I met a lot of women who have made a difference and who have volunteered their time and dedication to others. It was so much fun, and I even got the honor of teaching the GlamourGals founder and CEO, Rachel Doyle, how to crochet.
I strongly urge all of you to take a look at the amazing impact that GlamourGals has made upon communities all over the globe by taking the Hot Pink Pledge. Each donation, no matter the size, goes directly to support the GG Leadership Program which inspires and organizes teen girls around the country, helping them to take part in all of the support GG provides to its senior community of women. YOU, too, can make a difference; make a fashionable change today. For more information, check out the official GlamourGals website and the GG Blog.
The Hat that Turned into a Dog Sweater
So while I’ve been less than post-y lately, there have been a few little projects being snuck in between all of this job search madness. I am officially teaching 2nd grade starting tomorrow (covering an extended mat leave) and I’m happy to start being productive, teaching kids again, and reeling in a little cash for my family. The whole unemployed status sucks, and it was starting to get to me. Hopefully this position will keep me busy for awhile and there will be some other prospects on the horizon when it’s finished. We’ll see!
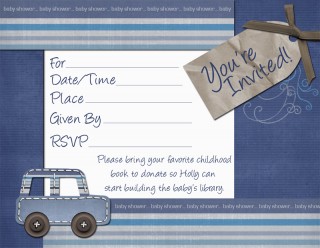
So I spoke of a few little projects, and the first of these is designing the invitations for my sister-in-law’s upcoming baby shower that I’m hosting. Well, hosting at my parents’ house. I’m delighted to have the honor of getting to throw her shower and I just didn’t like any of the pre-packaged baby shower invites out there. The obvious solution was to make my own. I went to Michaels and purchased a set of blank print-your-own cards to work with. The ones I chose come in sheets of two per page and are around 8.5″ x 5.5″; ideally meant as RSVP card inserts in a wedding invite but turned into fabulous baby shower invites instead. My inspiration came from a birthday card layout by Laurie’s Scraps and I designed the stitched car embellishment and tag for it myself. I may have to do a little mini kit to give away the car embellishment later. It was fun to make! Holly loves the invites and they were mailed out today. Here it is close up:
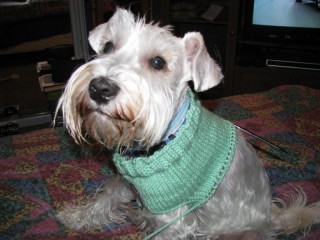
And now on to the topic project: the hat that turned into a dog sweater. I was feeling a little stressed out with all of the employment searching these past few weeks, and a little bummed when I applied to so many places and got so few calls back. Nothing seemed to be promising and I knew I just needed to knit a little something to keep me sane while waiting by the phone for decisions and callbacks. I thought that a plain vanilla newborn baby hat with a ribbed cuff would be the perfect simple, soothing knit. Except I didn’t gauge properly and somehow after doing the ribbing and starting the stockinette I realized that the hat would actually fit my head… not a good sign when the hat size is supposed to be sized for a brand new baby. *sigh* Jokingly I put the hat around our schnauzer, Winston’s neck, and suddenly the ribbing looked like the perfect turtleneck and the hat began to look more like a sweater. A schnauzer schweater, as I like to call it. So too-big baby hat has officially turned into a schnauzer schweater. Say it with me now, schnauzer schweater! This time with emphasis… SCHnauzer SCHweater! The real test is if you can say it five times fast. Ok I’m done, but it would be a great tongue twister, don’tcha think?
So I’m sorta making this pattern up as I go along — I cannot guarantee that it won’t turn into an epic failure but I’ll be sure to keep you posted, and if it turns out halfway decent maybe I’ll even post it here for all to try! Don’t hold your breath, though, little Winston looks less than enthusiastic about the prospect. I’ve decided that no matter how the schweater turns out, it’s at least exactly what I was looking for — something very plain and repetitive. I’ve been trying it on Winston as I go and while it works, I know if I did this again I’d make a few changes. All a part of the creative process, I think, and this process is fulfilling my needs at the moment.
Back Home Again, in Indiananaaaaaa…
So we’re finally settled (mostly) back home in Indiana. The move from Calgary, AB Canada to Indiana was a long one, but well worth the drive. It was quite an adventure with Lucas and the two boys — three long days of long hours in the car. You’d think anyone would go crazy being cooped up in a vehicle for such a duration, but I tackled my very first sweater on the trip and completed a set of baby mittens, too!
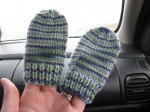
My future nephew is due in October, so I’ve been on a bit of a baby knitting kick lately. I’ve made bibs, spit up rags, toques, and now mittens and a baby sweater. The mittens were super simple and super quick and I love the result. A friend of ours suggested that they were mittens for Vulcans based on the way I posed with them, haha. Live long and prosper… warmly! The mitten pattern I chose was [Ravelry link] this one, “Baby Mittens” by Sassystitches.
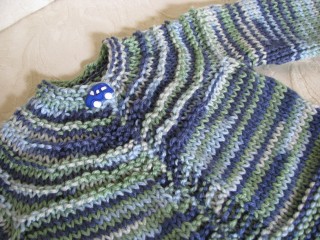
The baby sweater was the big project that took most of my time on the trip. I chose the very simple 5 Hour Baby Boy Sweater by Jesse’s Branch Charity Crafts. [Ravelry link]. I love the great little garter ridges on the yoke area and the matching garter trim on the jacket body and sleeves. I’ve never knitted a sweater before, so it was probably a good thing that I chose a baby-sized sweater to familiarize myself with the process. I knit starting with the yoke and went back and forth, increasing in a regular pattern, doing the cute little garter ridges until it was time for the sleeves. It got a bit complicated for me at this point because I had a lot of separating to do. Thank goodness for having a full interchangeable Knit Picks set, because I used extra short lengths of cables to hold stitches while I worked the sleeves. I think I would’ve rather knitted the sleeves in the round via magic loop now that I’ve gone through this pattern once, but I was worried about trying to modify an unfamiliar pattern on my first try. I should also admit that the “5 hour” of the 5 Hour Baby Boy Sweater actually took me more like 12 hours, but I chalk that up to my inexperience in knitting sweaters and the fact I was trying to spread the project out over a long car ride and taking my time. And, well, I’m also a pretty slow knitter! I blocked the sweater after we arrived and I think after adding the little car button as a finishing touch, that it turned out really well.
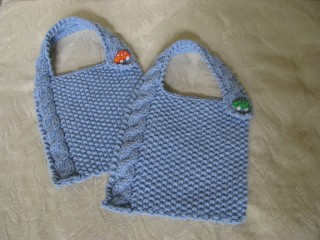
Speaking of little car buttons, I picked up a small pack of them and used them on my Modern Cabled Baby Bibs, too. Don’t the buttons add an adorable little boyish charm?
I recently had a few more people purchase my Crochet Cthulhu Toques so I barely had time to get settled in Indiana before I was busy crocheting away to complete the orders. While I’m job searching, it sure felt good to have orders to fill! Cross your fingers that something comes along soon… I’m starting to get antsy! :)
Moving Yarn
So my writing has been a bit scarce lately but there have been some craftings going on in the background. First of all, the reason for being so busy lately is because Lucas, the boys (Oliver and Winston), and I are packing up and moving back to Indiana to be near family. I didn’t get the job that I went home and interviewed for last weekend, BUT there will be other job opportunities and I can’t very well take them or be available for them when I’m 2k miles away in Canada. I sure am going to miss Calgary; I love the Canadian Rockies and I love just about everything about this beautiful country I’ve called home for the past three years. However, I also love my family and want to be near them as my brother starts his family (my first nephew is due in October!) and as Lucas and I eventually start our own family. I wish I could somehow have all of the great stuff about Canada and my family in Indiana all at the same time in the same place, but alas… something’s gotta give.
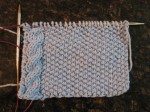
So we’re moving back to the U.S. on Sunday, July 26. Over the weekend we had a huge yard sale to get rid of just about everything we own; we’re taking the minimalist approach for the move. We’re going to be pulling a 4’x8′ trailer and that’s it, so if it doesn’t fit in a box that fits into the trailer, it’s not going with us. Oliver has done the cross country trip before; he moved from Indiana to Canada with me three years ago. This will be a first for little Winston. While we sat out front for the yard sale Saturday I finished knitting the second Modern Cabled Baby Bib pattern by Andrea Pomerantz. They turned out lovely! They are 95% finished; the knitting and blocking is complete but I haven’t had the time yet to pick out some super cute baby boy buttons to use. I figure I’ll find some when we get settled back in Indiana.
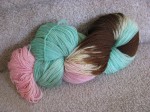
A few weeks ago, user Lesleyluu on Ravelry had a contest to create a new yarn colorway. I suggested “Lesley” (as it’s my name, too, and we spell it the same!) and offered up my three favorite colors together: pink, mint green, and browns. Kind like spumoni ice cream from The Old Spaghetti Factory. Yum! The colors turned out soft and ice-creamy, and absolutely dreamy. I didn’t win the first prize, but Lesleyluu did choose my colorway to make as a runner up, and I was then able to purchase “Lesley” from her Etsy Shop. Yay! It arrived in the mail earlier this week and I was so ecstatic. It’s a gorgeous superwash fingering weight BFL wool, and my head is swimming with all of the knitting project possibilities for this lovely yarn. Be sure to check out her other fabulous colorways on Etsy. And tell her “The other Lesley” sent you!
Anyway, as you can imagine I’ve been pretty busy lately. Tragedy has also struck my family and with the move and all of the tying up of loose ends here in Canada before we move back to the states, time has been short for projects. However, at the end of a long packing day I’ve found time to sneak in an hour or two of knitting. I’ve got some more burp cloths to make my sister-in-law for my future nephew in the Bernat handicrafter cotton color, “Hot Green.” Seriously, Hot Green? Have you ever heard of a more hideous (and perfect for baby spit up) color name? I can’t wait to make some appropriate spit up cloths from it! And you can be sure with 4 days of driving across the country in the car with my boys I’ll have plenty of little projects to work on and share once I’m back in the good ol’ Hoosier state. :)Â I’ll do my best to keep up on Twitter during our moving and cross-country knitting adventures, but don’t panic if it takes me another week or two before I can update here properly again ;) Take care!
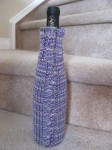
Cabled Wine Bottle Bag
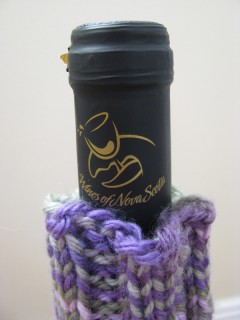
My parents’ anniversary is fast approaching (July 27) and I’ve had it in my head that I would make them something wine-related as they enjoy wine-ing with friends. I know that wine-ing isn’t a true word, but just go with it, ok? While Lucas and I were in Nova Scotia last month we picked up a bottle of local wine for them, keeping in mind that I was going to be knitting them up a wine bag for it later. This was an important choice to ponder as most wine bags are meant for typical shaped bottles of wine while my favorite wine to buy my parents is usually some kind of Canadian ice wine, which likes to come in these super skinny tall bottles instead. I picked out some Kellermeister by Jost Vineyards that has a very normal wine bottle shape. I’d like to be able to say that we’ve tried this wine and can give you an opinion, but we picked up a bottle of something else while we were in Nova Scotia and the name completely escapes me. But I’m sure Kellermeister is good. It’s a 4 out of 5 on the sweetness scale, and my parents enjoy wines on the sweeter side.
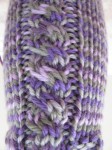
When searching for a pattern I had a few requirements. First of all, I wanted something that could be done in the round from top to bottom; just say no to seaming, folks (if saying no is an option). I also wanted something pretty. My recent interest obsession with cables had me looking for a cabled wine bag, but I wasn’t having much luck. Then I came across the Wine Bottle Cozy pattern by Tara’s Knits — her original bag is fantastically plain and simple, and so I decided I’d be able to modify the stockinette body of the bag by throwing in a cable pattern to spice it up. I’ve done enough cables to have a vaguely accurate idea of how to write up a cabled pattern and so that’s what I did. When it was all said and done I was happy; I think I would’ve liked to have made the cables bigger, but it definitely turned out lovely, don’t you think?
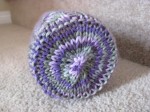
The yarn. Let’s talk about the yarn. Earlier in the new year, signs started cropping up in my local Michaels. “New yarn department coming spring 2009!” they said. I waited. And waited. It was discussed a lot on the Ravelry forums. Michaels finally unveiled their “new yarn department” and at first I was a bit disappointed because it basically just looked like they finally restocked the yarn aisles for a change and added more acrylic yarns to the mix. Like we need more acrylic! I was secretly hoping for a little more wool and other natural fibers, but I have to accept that Michaels is a big-box craft store that hosts thousands of other crafts besides knitting and crochet, so I guess I should be lucky that they’ve stocked so many different kinds and colors of acrylic instead of complaining; it may not be the yarn favorite, but I’m not a yarn snob and can admit openly without shame that acrylic definitely has its place. I have plenty of acrylic in my stash; it’s very multipurpose and washable. As part of the new yarn department unveiling, Michaels came out with their own new brand of acrylic. The brand is called Loops & Threads and the yarn’s name is Impeccable; it comes in ombres (mixed colors) and solids and is fairly soft for being acrylic. I’d been kinda drooling over the way the Seaside ombre colorway looked on a previous trip to the store (It’s gotta be the gorgeous shades of blues and greens that blend together so well. Oops, did I mention my recent infatuation with blue greens again?) and with a wine bag plan in mind, I saw it: the Impeccable colorway that blends violets and lavendars and greens together: Fresh Lilac Ombre. I don’t know, but doesn’t a colorway in grapes and greens seem like the perfect combination for something wine-related? I thought so.
If you’re interested in my modifications of Tara’s pattern to create your own cabled wine bag, all you have to do is sub in my cable pattern repeat (4 rows) in place of the stockinette body of the pattern. I did the ribbed top cuff the same and did the decreases at the end the same; the only thing that changed was instead of knitting row after row around and around for the body in stockinette, I created and followed the 4 row repeat below:
rows 1, 2, & 4: (k6, p1, k4, p1) each needle/repeat until end of round
row 3: (k6, p1, sl2 to cn & hold in front, k2, k2 from cn, p1) each needle/repeat until end of round
And there you have it! I’m thinking if I make another cabled wine bag in the future that I’ll switch the 4 stitches of cable with the 6 stitches of stockinette in between the cables. So I’ll cable for 6 stitches and only have 4 stockinette in between the cables. Does that make sense? I like big cables and I cannot lie… you other knitters can’t deny… ok I’ll stop there.
Recycled Wallpaper QP Freebie
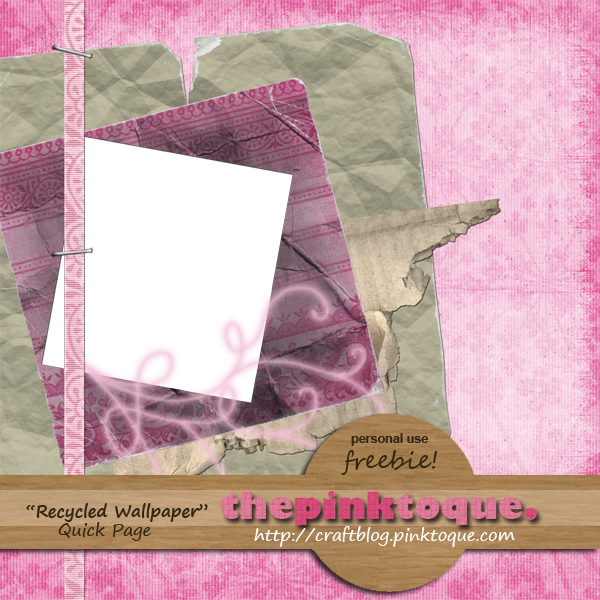 I’m baaaaaaack! Hopefully you liked the Recycled Wallpaper mini pack freebie given away yesterday :) Today as promised I’ve got the coordinating quick page to give away, too! It’s 3600 x 3600 pixels (12″ x 12″) and 300 dpi. It uses a little from the Recycled Wallpaper pack and then I added some other random stuff as I went. It’s a little pink, but pink is a very good color :)
Download the Recycled Wallpaper QP here!
Don’t forget that unless otherwise specified, my digital scrapbooking elements are for personal use only. Be sure to check out the TOU included and let me know if you have any questions. I hope to make some more new stuff in the near future, as time allows. Right now I’m back home in Indiana for a brief period this weekend in order to interview with the school district I taught at before I moved up to Canada. Cross your fingers! If I get a job offer, Lucas and I will pack up the boys and we’ll be on our way.
And of course, finding out last minute (Wednesday) that I was going to need to take a plane to Indy the next day (Thursday), one of the most important aspects of the packing wasn’t which outfit I was going to wear for the interview, or my teaching portfolio… but what knit projects I wanted to take with me for the flight! Haha. Ok so I’m probably exaggerating a lot (It took a long time for me to decide on an outfit, and I spent several hours touching up my portfolio), but it was a very important part of the packing. I had to figure out the patterns I wanted to take and wind some yarn for those projects into cakes to pack in my carry on. I’m going to be working on Danido Crafty’s Bebeh Earflaps Hat and the Modern Cabled Baby Bib by Andrea Pomerantz. I’ll let you know how it goes! :)
Have a great weekend, and wish me luck!


