Cabled Wine Bottle Bag
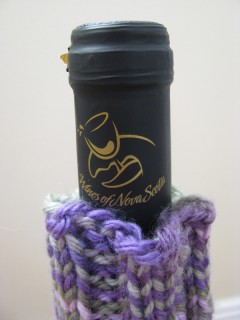
My parents’ anniversary is fast approaching (July 27) and I’ve had it in my head that I would make them something wine-related as they enjoy wine-ing with friends. I know that wine-ing isn’t a true word, but just go with it, ok? While Lucas and I were in Nova Scotia last month we picked up a bottle of local wine for them, keeping in mind that I was going to be knitting them up a wine bag for it later. This was an important choice to ponder as most wine bags are meant for typical shaped bottles of wine while my favorite wine to buy my parents is usually some kind of Canadian ice wine, which likes to come in these super skinny tall bottles instead. I picked out some Kellermeister by Jost Vineyards that has a very normal wine bottle shape. I’d like to be able to say that we’ve tried this wine and can give you an opinion, but we picked up a bottle of something else while we were in Nova Scotia and the name completely escapes me. But I’m sure Kellermeister is good. It’s a 4 out of 5 on the sweetness scale, and my parents enjoy wines on the sweeter side.
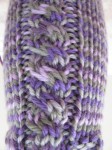
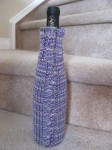
When searching for a pattern I had a few requirements. First of all, I wanted something that could be done in the round from top to bottom; just say no to seaming, folks (if saying no is an option). I also wanted something pretty. My recent interest obsession with cables had me looking for a cabled wine bag, but I wasn’t having much luck. Then I came across the Wine Bottle Cozy pattern by Tara’s Knits — her original bag is fantastically plain and simple, and so I decided I’d be able to modify the stockinette body of the bag by throwing in a cable pattern to spice it up. I’ve done enough cables to have a vaguely accurate idea of how to write up a cabled pattern and so that’s what I did. When it was all said and done I was happy; I think I would’ve liked to have made the cables bigger, but it definitely turned out lovely, don’t you think?
The yarn. Let’s talk about the yarn. Earlier in the new year, signs started cropping up in my local Michaels. “New yarn department coming spring 2009!” they said. I waited. And waited. It was discussed a lot on the Ravelry forums. Michaels finally unveiled their “new yarn department” and at first I was a bit disappointed because it basically just looked like they finally restocked the yarn aisles for a change and added more acrylic yarns to the mix. Like we need more acrylic! I was secretly hoping for a little more wool and other natural fibers, but I have to accept that Michaels is a big-box craft store that hosts thousands of other crafts besides knitting and crochet, so I guess I should be lucky that they’ve stocked so many different kinds and colors of acrylic instead of complaining; it may not be the yarn favorite, but I’m not a yarn snob and can admit openly without shame that acrylic definitely has its place. I have plenty of acrylic in my stash; it’s very multipurpose and washable. As part of the new yarn department unveiling, Michaels came out with their own new brand of acrylic. The brand is called Loops & Threads and the yarn’s name is Impeccable; it comes in ombres (mixed colors) and solids and is fairly soft for being acrylic. I’d been kinda drooling over the way the Seaside ombre colorway looked on a previous trip to the store (It’s gotta be the gorgeous shades of blues and greens that blend together so well. Oops, did I mention my recent infatuation with blue greens again?) and with a wine bag plan in mind, I saw it: the Impeccable colorway that blends violets and lavendars and greens together: Fresh Lilac Ombre. I don’t know, but doesn’t a colorway in grapes and greens seem like the perfect combination for something wine-related? I thought so.
If you’re interested in my modifications of Tara’s pattern to create your own cabled wine bag, all you have to do is sub in my cable pattern repeat (4 rows) in place of the stockinette body of the pattern. I did the ribbed top cuff the same and did the decreases at the end the same; the only thing that changed was instead of knitting row after row around and around for the body in stockinette, I created and followed the 4 row repeat below:
rows 1, 2, & 4: (k6, p1, k4, p1) each needle/repeat until end of round
row 3: (k6, p1, sl2 to cn & hold in front, k2, k2 from cn, p1) each needle/repeat until end of round
And there you have it! I’m thinking if I make another cabled wine bag in the future that I’ll switch the 4 stitches of cable with the 6 stitches of stockinette in between the cables. So I’ll cable for 6 stitches and only have 4 stockinette in between the cables. Does that make sense? I like big cables and I cannot lie… you other knitters can’t deny… ok I’ll stop there.


