Current Crochet Projects
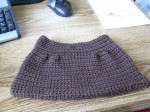
So in the background this past week I’ve been hard at work on three crochet projects: take 2 on the crochet handbag I tried at the end of August, a hat for Somer for her birthday coming up in November, and a small crochet pumpkin.
The second try on the crochet handbag is going… ok. If you remember, I had followed a great pattern for the first take but the finished result seemed to be a bit too wide and not quite tall enough for my purse needs. I decided I’d make a second handbag, adjusting a few lines of the pattern to make the overall bag not as wide and a bit taller. I am not sure now that the purse will be big enough just in general now that it’s not as wide. But I didn’t like the awkward space in the corners of the bag when I made it as wide as the pattern called for; at least for my personal preference. Maybe if I had just changed the height to be taller, the width would’ve balanced itself out? I am not quite finished with take 2, but it already sounds like attempt 3 is taking shape. We’ll see how it turns out after I add a closure, line it, and add the handles.
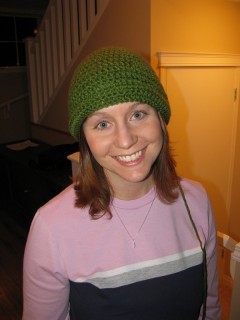
The beanie is something I’m pretty excited about. I hope Somer doesn’t read my blog before her birthday next month, but I just can’t not post about it. It’s a frog hat, and I’m nearly finished with it; it’s from a pattern here by Crochetroo, and is so darn cute! :) It’s basically a double crochet beanie hat done in green (I chose Vanna’s Choice in Kelly Green, my first time using Vanna’s Choice. I really like working with it and will be using it again on other projects that call for a simple worsted weight yarn.) and then there are two double crochet eye “bulbs” that you attach on top. The pattern calls for googly-eyes (which in general I despise) but I think they’re a perfect fit for this project and will give it just the right finishing touch when I hot glue them to the center of each eye bulb. I just have to go out and purchase some googly-eyes! It’s a quick crochet and I started it Tuesday evening before House came on and then finished up the beanie portion last night in no time. Today I plan to do the band and then work on the eyes. Even though it’s spanning over 3 days, the amount of time I spent each day was very small and this could easily be done in one evening I think. It gives me ideas for making a teddy bear beanie, using the same pattern just in brown and not adding googly-eyes at the end (so the eye bulbs of the frog would be teddy bear ears.) Not that I have time to add more things to my queue for Christmas projects, but oh well. Love the pattern!
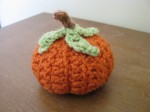
And the small crochet pumpkin is one of my favourite finished objects right now. It turned out so cute! :) I followed the YouTube tutorial by Teresa, who is tjw1963 on Ravelry, and she is the founder of the Video Crochet group there which has been immensely helpful in my learn-to-crochet endeavour. She has some amazing videos on YouTube for all kinds of projects and demonstrating a huge variety of crochet stitches. Her blog accompanies her video tutorials in case you want written instructions for each pattern to follow along with, too. As most of you know, this past week was Canadian Thanksgiving, and my husband and I were invited to my friend Michelle’s mom’s house for dinner. It meant a lot to us, because Michelle’s mom and grandma treated us like family, and we really felt special being invited to their family Thanksgiving dinner. I made this little crochet pumpkin and attached a thank you tag to it and mailed it off today to thank Michelle’s mom for including us. We plan to return the favour and have their family over for American Thanksgiving next month :) Michelle is such a good friend; how nice it was to feel like family, too.
So that’s what I’ve been up to in the fibrearts world! Once I finish Somer’s froggie beanie I plan to get started right away on matching doggie sweaters for Oliver and Winston. I can’t wait! They’ll be done in Bears colours, of course: a beautiful navy blue and pumpkin orange. :love: Little Winston goes for his neutering appointment tomorrow morning first thing, so keep him in your thoughts! It sounds like he’ll have to wear a cone for a bit until the incision heals, which will make for some admittingly hilarious photos. Am I evil for thinking that? lol :lol:
See you tomorrow for Freebie Friday!
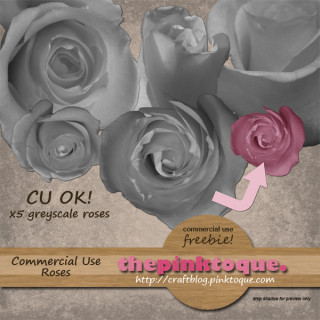
CU Roses Freebie
Just popping in to give away a quick commercial use freebie this evening: some roses! My husband is such a sweetheart and brought me home these gorgeous roses for no reason at all late last week. I wish I could keep cut flowers forever, but eventually they wither and I have to toss them in the trash. I decided I’d try my hand at photographing and extracting a few of the roses so that in a way, I could keep them forever… and give them away as a commercial use freebie so that others could benefit from them, too!
There are five greyscale roses in this kit, and each one is easy to recolour to match and supplement any of your kit designs. Please be sure to read the commercial use terms included! I hope you’ll find some good uses for these beautiful flowers.
Download my CU roses HERE.
See you back on Friday for Freebie Friday — I have a new mini kit and a new QP to give away this weekend that I know you won’t want to miss :) Enjoy your evening, and I look forward to reading any comments you leave!
My Memories Suite Tutorial 3: Using Quick Pages
My latest tutorial for My Memories Suite is ready to go! Today’s tutorial, the third in the series, teaches you how to use quick pages within the My Memories Suite software. The tutorial assumes that you have already watched tutorial 2 and understand how to add additional content to your program’s directories (which you must do to add quick pages) and then how to physically use quick pages you’ve added within My Memories Suite. It’s a quick and simple video this time (under 8 minutes, whew!), and I’ve put it over at YouTube since YouTube will allow you to watch in high quality and bookmark it for later use.
If you have any questions about the third installment of the My Memories Suite tutorial series I’ve been creating, let me know and I’d be happy to help or explain anything that isn’t clear :)
Need a quick page to use as a test when you follow along with the video? Nab my “Thankful for You” quick page from Sunday — it’s a great way to show off the things you’re thankful for this season :) Happy scrapping!
Updated January 28, 2009: I am now part of the affiliate program and can offer readers of my craft blog who enjoyed this tutorial a $10 discount on the My Memories Suite software, plus an additional $10 to spend in the MMS online store! To get the discount, click the banner link in the upper right corner/sidebar of my blog (Where it says “Get My Memories Suite”) or the link below, and use coupon/promo code STMMMS21122. Enjoy! :D
My Memories Suite $10 discount PLUS $10 to spend in the MMS online store, ORDER NOW! (with code STMMMS21122)
Happy Canadian Thanksgiving!
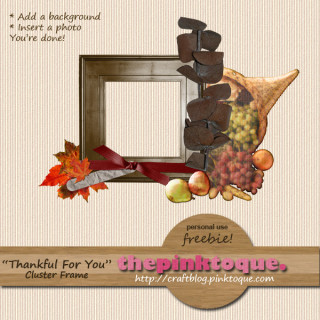
Happy Thanksgiving, Canada! Yesterday I gave away my “Thankful for You” quick page, and today I have another little freebie for you: the “Thankful” series of cluster frames! There are two frames in the pack, identical except that on one, the tag already has the text “Thankful for You” on it while the other frame’s tag is blank in case you want to put your own sentiment there instead. All you have to do is add your own background and insert a photo and voila! Show the world what you’re thankful for and use the frame on your own choice of background to give it your own personal flair. No matter if you use the QP from yesterday or use today’s frame(s) to incorporate into your own personal use designs, be sure to show off the people you are thankful for proudly, and don’t forget to remind them today, too!
Download my “Thankful” series of cluster frames HERE and be sure to leave some love if you download!
I’m working on some more freebies for you; I’ve created a little kit (and a coordinating quick page) to the tune of spending time in the mountains during fall as well as another autumn-y quick page that I’ve used to showcase photos from our little family trip out into the Canadian Rockies on Saturday to experience the fall colours. Want to see all of the fantastic photos we took? Check out our family gallery here. But don’t blame me if you suddenly have an urge to move here! ;) I’ve got some upcoming CU items coming as well, and even a new alpha. So much to give away it’s going to take weeks to release it all! See you back here real soon :) Hope you and yours have a wonderful Thanksgiving. <3
Thankful for You Quick Page Freebie
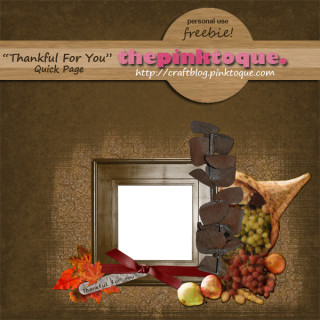
Happy Sunday everyone :) With it being a Thanksgiving long weekend I’ve got the first part of my Canadian Thanksgiving freebie giveaway for you today, and the other piece will be released tomorrow in time for turkey and all the trimmings. :) I whipped up a little quick page that I call “Thankful for You” that will be perfect to showcase what YOU are most thankful for this Thanksgiving. I chose a recent photo of my boys together: my husband, Lucas and our two dogs, Oliver and Winston because I am most thankful for my happy little family.
Download my “Thankful for You” Quick Page HERE.
Yesterday we spent the day out in the Canadian Rockies at Lake Minnewanka in Banff National Park hiking up along the trails there around the lake and enjoying the fresh air and the last of the fall colours before the snow comes.
Surprisingly it was very sunny and not windy enough to make it too cold for us, and we took some amazing photos. I can’t wait to get scrapping with them; you can be sure I’ll have some to share very soon. (Along with a freebie that coordinates with the day!)
This evening we’ve been invited to have Thanksgiving dinner at Michelle’s mom’s house and we are thankful to have such good friends. Hope everyone has a great Thanksgiving! See you back here tomorrow for the second part of “Thankful for You.”
Freebie Friday: Hockey Night in Canada
I know it’s Thursday and so my Freebie Friday gift is coming a little early (though DigiFree won’t pick it up until tomorrow morning anyway) but the regular hockey season is definitely upon us now and my Flames are playing Vancouver this evening as their first game of the year. How exciting! :) Tonight CBC will announce the top two finalists for their new Hockey Night in Canada theme song, after narrowing the list down from 5. I participated in the vote a few days ago and can’t wait to see whether or not the one I chose out of the 5 make it. The second round of voting will commence this evening after the finalists are announced, and then the new hockey anthem will be revealed on Hockey Night in Canada’s traditional Saturday evening doubleheader game on CBC.
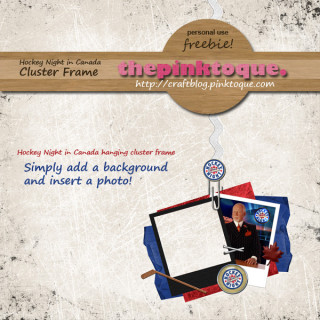
With all of this Hockey Night in Canada excitement, I thought I’d give away a fun hanging cluster frame featuring a space for your photo in a polaroid alongside Don Cherry himself in a HNIC themed freebie! :) Personal use only and all that jazz. See TOU.
Download my Hockey Night in Canada hanging cluster frame HERE!
And don’t go too far; I’ll be back on Sunday or so to give away a quick page I’ve made in celebration of Canadian Thanksgiving coming up here on Monday that I’ve named “Thankful for You.” So stay tuned! Enjoy the freebie :)
My Memories Suite Tutorial 2: Adding Additional Content
The second installment of the My Memories Suite tutorial series that I’ve been working on is ready for view! This time around I address adding additional content such as freebies or other graphics to the program’s directories for use within the software. This allows you to use digi scrapping freebies (or ANY image files such as clip art from the internet, things you design yourself OR even items you scan!) in My Memories Suite just as if it were pre-loaded content.
The fact that My Memories Suite allows you to use any and all common image files (such as .JPG or .GIF or .PNG) means that your possibilities with the software are endless. While the program comes with tons of pre-loaded backgrounds, embellishments, etc. one day you’ll want to add more, and it’s very easy to do as you can see in Tutorial 2. You’re not just limited to adding just digi scrapping freebies, either. In this tutorial I show you how to add a typical digital scrapbooking freebie kit and how you can scan personal mementos like movie stubs or concert ticket stubs and add them the same way so that you can digitally scrap with physical mementos you’d normally paste in a traditional scrapbook. The sky’s the limit with My Memories Suite, and I’m here to show you how easy it is to make the software your own. Easily add downloaded freebie kits from DigiFree or scan physical objects such as a napkin from your friend’s wedding or a greeting card you’d normally scrap traditionally and use it within My Memories Suite digitally instead!
This is the second tutorial in the My Memories Suite software tutorial series and is roughly 18 minutes total in length. You can check it out over on YouTube where you can bookmark it, download it and save it just in case you don’t have all 18 minutes to spare all at once.  If anything is unclear, just let me know! I have plans for at least 3 other tutorials as well. If you missed the first tutorial, which was an introduction to the software’s basic features and capabilities, click here. Each new tutorial piggybacks off of the previous videos, so you’ll want to watch them all! Stay tuned for more tutorials in the near future, and if you have any suggestions for future tutorials (wondering if My Memories Suite can do this or that? Just ask!) drop me a line and let me know; if it’s not already something I’m planning to do, I’d be happy to make more.
And thanks for the kind comments on yesterday’s Tags and Scraps freebie; I’m glad you enjoy them! :) See you back soon for more goodies. Take care!
Updated January 28, 2009: I am now part of the affiliate program and can offer readers of my craft blog who enjoyed this tutorial a $10 discount on the My Memories Suite software, plus an additional $10 to spend in the MMS online store! To get the discount, click the banner link in the upper right corner/sidebar of my blog (Where it says “Get My Memories Suite”) or the link below, and use coupon/promo code STMMMS21122. Enjoy! :D
My Memories Suite $10 discount PLUS $10 to spend in the MMS online store, ORDER NOW! (with code STMMMS21122)
Updated April 23, 2011: Google Videos is ceasing to exist- you will now find the tutorial above on YouTube, and all links and embeds have been updated to reflect this change :)
Tags and Scraps
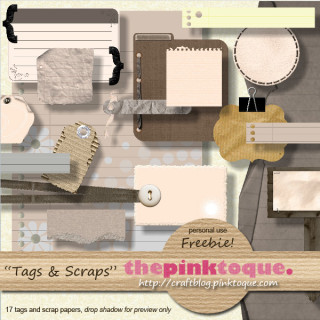
So I’ve had this freebie element pack sitting around, finished forever ago it seems. I don’t know why it’s taken me so long to release it; my only thought is that I keep coming up with new ideas that I can’t wait to make ASAP, and then those take priority when they’re finished and I release the new stuff instead. Maybe it’s because I’m getting better and better as a designer and so I get really excited when I make something new because I like the way it turned out? I’m definitely trying and I’ll just pretend that’s the reason ;)
Free for you today is my little “Tags and Scraps” pack, which is filled with… you guessed it: tags, tags and MORE TAGS!
Download “Tags and Scraps” set HERE.
More often than not I tend to find myself near the end of designing a digital scrapbook page and suddenly lacking a good vehicle for dates and short journal wordings. What’s a girl to do?  Sometimes I try to be artistic and pick an area on the page where I can type my wording alongside a photo or on the edge of a mat, but sometimes you just need a good tag for dates and little quips. My solution? Make a set of general, all-purpose tags! And even better: share them as a freebie with the rest of the digital scrapping world. 15 personal, non-commerical use tags and two notepapers that you can use with just about any layout! So today I present to you my set of tags. I hope they help you add that finishing touch to your scrapping projects when you need just a little word space.
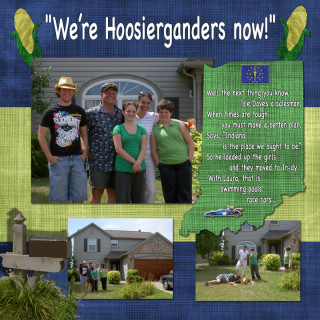
And also in digi scrapping news, my Ohiogander friend Nani sent me the sweetest email showing off a fabulous layout that she created using pieces of my Hoosier state kit for her scrapbooks. Isn’t it awesome? You should really check out her blog: The Chronicles of Nani. Thanks so much for sharing, Nani! Page posted with Nani’s permission. I really love seeing what others do with my freebie kits. I’m so lucky to have such kind and wonderful readers! <3 :heart:
Enjoy today’s freebie and Nani’s layout and blog! You can be sure there are more freebies on the way; I’ve got so many waiting to be released that I’m just not sure what I plan to give away next! Haha, there are worse dilemmas to be in I guess ;) Take care and happy Tuesday!
Free Pattern: Scalloped Baby Blanket
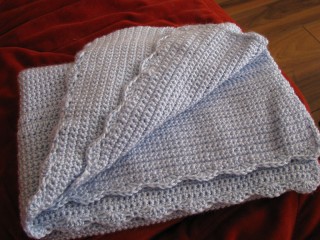
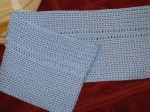
I’ve finally completed it: a scalloped edge baby blanket for our friends Kali and Caley, who are expecting their first baby (a boy) sometime in January. Â I just learned crochet about a month ago, so this was a very ambitious project for me! Â I tried to make everything as simple as possible so I created my own pattern that would be elegant, and yet also allow me to really practice those basic crochet stitches. I added the scalloped border to be “wild” because I was feeling confident. Â Now that I’ve completed a baby blanket, I can do anything! Â It took me a month to do, but I was only putting in a few hours or so here and there (maybe once a week?) and taking my time. Â This could easily be done in a weekend if you are a veteran crocheter. Â So enough jabbering, here’s the pattern! (And please be kind, it’s my first time writing a crochet pattern!)
The Ckalieys’ Scalloped Baby Blanket
Materials
- 3 skeins (1365 yards/15 oz) Bernat Softee Baby Solids in Pale Blue
- US H/8-5.00mm crochet hook
Notes
This blanket is built body first, then the scalloped top and bottom edges are done afterwards. Â The body has a simple pattern that even the newest crocheter can handle!
Stitches/Abbreviations Used
sc = single crochet
dc = double crochet
ch = chain
st = stitch
Shell Stitch (described below)
Instructions
Body
ch 110
row 1: sc in second chain from hook, sc in each st across (109 sts)
rows 2 – 20: ch 1, sc in each st across (109)
[The “decorative pattern”]
row 21: ch 2, dc in each st across (109)
row 22: ch 1, sc in each st across (109)
row 23: ch 2, dc in each st across (109)
You will alternate between doing 20 rows of sc and then the three rows that make up “the decorative pattern” until the blanket is as long as you want it to be.
Basic Pattern Idea
*20 rows of sc
(ch2) 1 row of dc
(ch1) 1 row of sc
(ch2) 1 row of dc*
Repeat from * to * until you reach your desired length. I went around 34″ or so. Since you start with 20 rows of sc, make sure you end with a completion of a group of 20 rows of sc to make it look even. (So don’t end with the dc/sc/dc pattern.)
Border
Once the body of the blanket is the length you want, you’re going to immediately turn your work and do the shell stitch back across that final row.
Shell Stitch
*Skip 2 ch, dc 5 times in the third ch : skip 2 ch, sc in the third ch* across (18 shells)
Once you have completed your last shell stitch, you’ll now turn your work clockwise and slip stitch down the long side of the blanket to get to the opposite end. Â Once you get there, turn your work again clockwise and you’ll see you’re at the opposite long end of the blanket. Â Your first set of shell stitches should be on the furthest end from you. Now shell stitch across this bottom row. You now have shell scallops at the two farthest ends of the blanket. Â Turn your work clockwise one final time and slip stitch up the long side until you reach your initial shell. Â You should have made a complete square trip around the outer edge of your blanket, giving the two furthest ends from each other a pretty scalloped edge and slip stitching the two longest sides.
Fasten off and weave in all ends. Â Tada!
Bernat Softee Baby is machine washable and dryable. Instructions:
Machine Washing and Drying: Wash in water (not exceeding 40°C/104°F) at permanent press setting. Do not bleach. Tumble dry at low heat, at delicate setting. Do not iron or press. Do not dry-clean.
Good luck! :) And if anything is unclear or I’ve made a mistake, please let me know, since as I mentioned, it’s my first time ever writing up a crochet pattern. Â If you make any scalloped edge baby blankets, I’d LOVE to see them! Â Drop me a line at craftblog at pinktoque dot com so I can feature you. :)
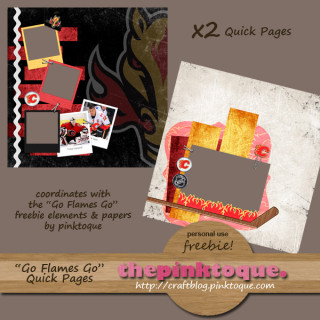
"Go Flames Go" Quick Pages
The third and final day of the Flames Freebie 3 Day Extravaganza is upon us and today I have the final piece for you: two quick pages! The quick pages use elements and papers from my “Go Flames Go” freebie kit. If you missed out on the papers you’ll find them here, and if you missed the elements pack, grab them here.
I am looking forward to using these quick pages myself; we’ve got tickets to the October 30th Flames home game vs. the Boston Bruins. What better way to show off some fun pictures of Lucas and I at the game than with these easy-to-use quick pages? :) If you have any trouble using them, just let me know and I’d be happy to help.
Nab the two “Go Flames Go” quick pages HERE!
So it’s Sunday and that means football around here. The Bears play the Lions and my husband’s team (the Bengals) play Dallas — eep! Time to enjoy a lazy day watching football and crocheting on the couch. Ahhh… I love Sundays! :) Enjoy your freebie and your Sunday!
P.s. I have around 10 freebies (some kits, some QPs, some cluster frames and even an alpha!) sitting in my “ready to release” folder… so be sure to check back for A LOT more goodies very soon. :)
