Unoriginal Bordered Basket Weave Dishcloth Pattern
Happy Canada Day! If you’re looking to whip up something patriotic today (or on Saturday for the 4th of July) check out my free pattern suggestions over at Knitting Under The Desk – I think you’ll like both the Canadian and U.S. holiday ideas. And if you’re an American like me living in Canada, you’ll find time to squeeze in one of each! Celebrating two holidays just plain rules.
I’ve been working lately on a dishcloth set for my boss. It’s summertime, and that usually means some kind of temporary office job to keep me busy between school years. Lucas and I are looking at moving back to Indiana very soon, and I recently realized that my time at the office will very quickly be coming to an end. Everyone there has been really fantastic, and I wanted to make a little something for my boss, who is wonderful, and the girl who showed me the ropes and trained me for the job, who is also really great. (See the bookmark I made for her a few weeks back here.) Sort of a “so long, thanks for being awesome” gift.
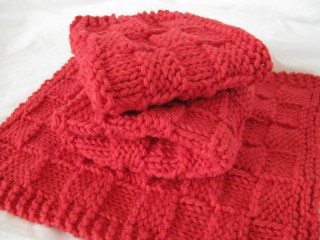
My boss mentioned not too long ago that her kitchen is done in black and red. Mostly black and dark wood with punches of red. When I started trying to figure out what I wanted to make for her as a “so long and thanks for being awesome” gift this summer, I decided some bright red dishcloths would be perfect. Then the search began. You know, there’s an awful lot of dishcloth patterns out there. I tried out a few and just kept getting discouraged. Nothing seemed to be just right. Then I started messing around with the basket weave stitch (more like alternating stitches evenly to create a basket weave effect more than a stitch), which was featured on a ton of the dishcloth patterns I was perusing, but eventually I just said “forget it” and put together my own version of a bordered basket weave dishcloth pattern. Unoriginal, I know. And seriously, just what the world needs is another dishcloth pattern, but really… this turned out well and I like how the borders gave it a really sharp, neat look to it when all was said and done.
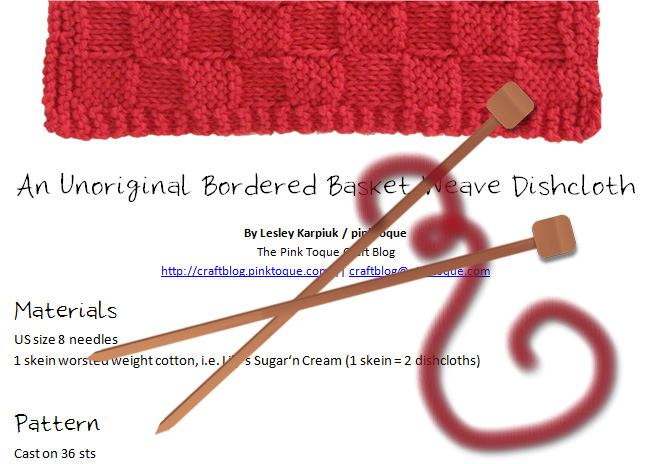
So my pretties, as a Bonne fete du Canada gift, I present to you… my Unoriginal Bordered Basket Weave Dishcloth pattern. Free, of course. I think you’ll rather like the simplicity and reversibility of it! Not to mention that the little pocket square texture makes a great surface for scrubbing with. I have made three so far and am planning on making one more and then folding them up all pretty (after blocking for presentability’s sake, of course) and tying with a black ribbon.
What You’ll Need
x1 skein of Lily’s Sugar’n Cream worsted weight cotton (1 skein = 2 dishcloths. Score!)
US size 8 needles
Download the PDF here [non-Ravelry users] or on Ravelry as a free [Ravelry PDF download].
Well that wraps it up for today; Happy Canada Day (and Independence Day on Saturday!) Lots of love and hope you enjoy the pattern :)
Delicious Nova Scotia Yarn
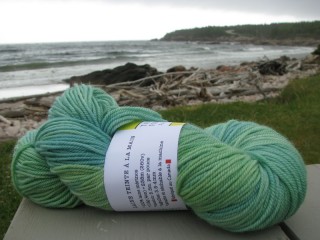
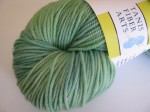
Tanis Fiber Arts yellow label DK weight in Spearmint, photo © Lesley Karpiuk / pinktoque, taken on Cape Breton Island, Nova Scotia on the Cabot Trail.
On the Friday of Lucas and I’s Nova Scotia trip we spent the day being too pumped about exploring downtown Halifax to remember that we’d gotten nearly no sleep on our red eye flight in. We found Halifax to be a really fantastic city; it was a big city with a small town feel, and we really enjoyed it. Of course I had researched ahead of time to find local yarn shops, and on Friday we checked out The Loop Craft Cafe on Barrington Street right in the heart of the city. What a great little place! Lucas insisted that I pick out something to treat myself. I’ve never actually purchased any “fancy” LYS yarn before; only drooled and wondered when my skills would be proficient enough to warrant purchasing something so lovely. I don’t know why, but I don’t feel I’m an incredibly skilled knitter yet so I’ve put off buying expensive yarns because I’m afraid that my mediocrity would just waste it. I realize this is foolish, and so I let Lucas treat me without much of a struggle. We were on vacation, after all! I had a hard time picking out just one thing to treat myself with. I’m thoroughly pleased with my choice, however!
I picked up a hank of Tanis Fiber Art’s yellow label DK weight superwash merino. I own some merino, folks. This is a HUGE deal to me. I chose the Spearmint colorway because I’ve found myself obsessively drawn to gorgeous sea greens and mints lately. Don’t worry, pink, I would never choose a true favorite over you… but sea green is so heavenly. And seemed especially fitting on our seaside trip. I was ecstatic to find that Tanis Fiber Arts has an etsy shop; this means when I run out of Spearmint I know where to get more without having to go back to Halifax… though that would make for a good excuse to get back out to the east coast; I sure did love it out there! This superwash merino is so squishy and soft that no other word but smooshy applies and I finally understand the meaning of such a word. It’s fantastic. I highly recommend checking out Tanis Fiber Arts on Etsy; you’ll love what you find there. I’d love to knit something fabulous in the Jewel colorway for my mom because she’d love the delicious violets and fushias blended together. Yum!
I lovingly toted my new yarn around and later photographed it with the backdrop of a quiet little beach in the Highlands National Park on the Cabot Trail we drove on Sunday. Cape Breton Island is so gorgeous! I haven’t completely decided what I’m going to make from this yarn, but whatever I choose it will definitely be just for me.
Nova Scotia Trip Projects
We’re back! Well, we got back on Monday night but I’ve been so busy this week finishing off the final week of one online course and having a second week-long-only course start up first thing Tuesday that I’ve been reading, reading, reading, and writing several papers. Most of my work (all due tomorrow) is in and done, including my final papers for both classes, so I can finally update you on some Nova Scotia trip crafts!
First of all, Nova Scotia was AMAZING. What a perfect wedding anniversary trip. We saw some of the most beautiful scenery and had some of the most relaxing experiences ever. And we got to do it together. It was utter bliss. Lucas wrote all about it over on our personal blog: Honeyversary? Anniversamoon? Honanniversamoonary?! so be sure to read all of the wonderful details and check out all of the gorgeous photos we took there.
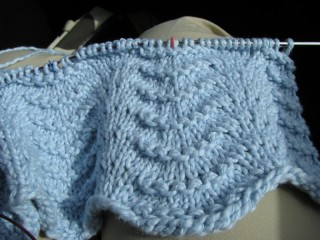
So… as far as crafts go, Lucas and I both took our baby blanket patterns on the plane with us so we’d have a project to keep us busy during downtime. On the Saturday, which was our actual anniversary, we relaxed after the adventures of the day on the balcony of our seaside cottage and knitted while we enjoyed the sound of the Atlantic ocean waves crashing up onto the shore just a few feet in front of us. It was amazing! Knitting together with that kind of relaxing scenery while inhaling fresh ocean air was a moment in time I wish I could’ve preserved forever. I tried to in photos at least:
The blankets are really coming along! I’m about 65% through mine, but I’ve had to take a small break to switch and work on a little dishcloth gift set that I’m making for my boss. As it’s a temporary office job to keep me busy during the summer and Lucas and I are planning to move back to Indiana soon, I know my time there is going to be coming to an end soon and I’d wanted to make something to give to her in thanks for being so awesome. More on that project in another post.
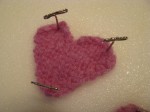
The hearts. Remember in my last post how I’d mentioned a little secret knitted hearts project that I was trying to get done in time for our anniversary trip? Those went over really well :) After felting I sewed them together to create three little plush knitted hearts. I hid those in my purse and took them with us. I distributed the hearts over the course of the weekend in various times/places kind of spontaneously.
The first one I gave to Lucas when we were enjoying the breathtaking views at Peggy’s Cove. It was so peaceful and seemed like the perfect time to give him a token of my love. The second one I gave him the morning of our actual anniversary while he was in the shower. I sneakily placed it next to his wedding ring and glasses — two things he removes when showering. He came out to put them on and found the second heart there with his things. On the third morning it was the same idea, but this was Sunday… Father’s Day… so I placed a knitted heart on the nightstand at our seaside cottage with his glasses and a Father’s Day card that I had also sneakily made and brought without him knowing. The Father’s Day card came from our two dogs, Oliver and Winston. The inside had “Thanks for being a great dad” scrawled in doggie handwriting with pawprints for signatures. It was all very sweet :)
So those are our Nova Scotia trip projects! I’ll post soon about the really pretty cabled wine bottle cozy I finished recently for my parents’ anniversary coming up in July and the dishcloth set I’m making for my boss. First I need to find and settle on a dishcloth pattern I’m happy with! It seems I’ve started this project over more times than I can keep track of now, which is why it’ll be a post for a later time… I don’t have any photos yet because I’ve not gotten further than around 10 rows each time before I frog it back. lol.
More updates to come soon! :) Take care
Some Successes to Follow the Failure
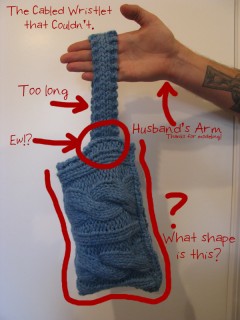
So lately I’ve been a bit negative (I especially loved the “wtf?” photo of the Cabled Wristlet That Couldn’t earlier this week, lol) so I thought it would be nice to share the successes that I’ve completed too. I’m not a total knit failure!
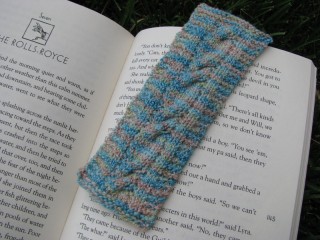
First up, a cabled (are you surprised? I said I was obsessed with cables now) bookmark for a co-worker of mine. (I used the Virtue Bookmark pattern by Jeannie over at Gilded Bottle.) Right now I’m working a temp office job for the summer, and the girl that showed me the ropes (and was trying to do her job and my job for far too long before they found me) is really kind. She’s great to work with, and I know that she reads A LOT. Like, a lot a lot. I know that my time in the office will come to an end at the end of the summer (hopefully because we’ll be moving back to Indiana) and I’m thinking in advance what I’d like to make for a few of the people who have made working there really fab. This bookmark will accompany a Chapter’s gift card nicely, don’t you think? I plan to knit my boss a set of deep red fancy dishcloths to spice up her black and red kitchen, but I haven’t started those because I’m still waiting for the order of red cotton to arrive. Any day now!
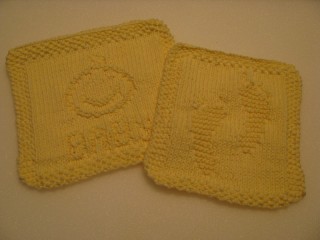
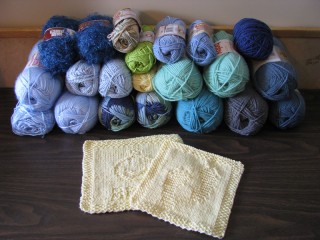
And because baby knitting has suddenly become the center of my knitting attention with a future nephew on the way, I’ve begun knitting for my brother and sister-in-law. First up are some spit-up cloths, aka washcloths. They turned out rather cute I think. The baby face pattern from Dishcloth Diaries was a pain to follow along with because there were so many changes and steps in each row at first, but I got through it. I especially like the baby feet one by Rhonda White, though I disliked working bobbles. My bobbles seem to be on the “wrong” side. I guess it doesn’t matter since you can still tell what they are, no matter what side you’re looking at. While these are pretty and hand knit, I expect them to be covered in baby puke and other interesting things very soon. That’s why they are in cotton! I used some of the yellow we had leftover from making Batman cloths for my friend Michelle, because yellow is a good neutral baby color. Last night we also picked up more blue cotton and some interesting puke green and brown cotton to make bibs and more cloths. Did you know ‘Hot Green’ was an official Bernat Handicrafter cotton color? LOL. Too awesome.
And speaking of baby knits, my friend Chicaschmica over at One Crafty Place inspired me by posting about Craft Hope, whose current charity project is knitting baby blankets, booties and hats in partnership with the Miracle Foundation to supply for newborns in India. It sounds like a really fantastic cause and I’m sure I’ll find plenty of time to make extra baby knits to send in the upcoming baby knit surge. If you’re interested in helping out a very worthy cause, head on over to Craft Hope where they are “spreading seeds of hope one stitch at a time” to find out how you can get involved.
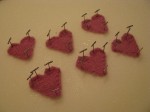
Another mini project that needs to be kept on the down low… I’ve just felted some cute pink knitted hearts; which is also the very first knitted pattern I ever followed, to be exact. This is the third batch of these cuties from the Mochimochi blog that I’ve made, and I remember my first attempt to knit them waaaaaay back when I first learned how to knit. I had to have someone at a LYS show me a KFB because it just wasn’t making sense in the instructions. I was such a noob! I’ve knitted these and am felting them secretly because I plan to sneak them into our luggage when Lucas and I go on our wedding anniversary getaway this weekend and have them just “show up” randomly during our trip ;)
Ok that’s all for now. See you when we get back from Nova Scotia next week! And don’t worry if you follow along over at Knitting Under the Desk — I’ve already written up a post that is scheduled to post automatically for me Monday morning while I’m on vacation. You’ll want to check it out for sure; I LOVE the pattern I came across and plan to cast on for myself soon. (Like I need to add another project to my to do list or WIP list…) Later!
It's (Gonna Be) A Boy!
My brother and sister-in-law found out today that they’re having a BOY! I am so ecstatic that I will have a nephew in October that Lucas and I went yarn shopping right after work. Do you think we got enough? The next few months will be filled with baby toques, booties, bibs, puke cloths, blankets and everything in between. I’m planning to pack the blanket pattern I’ve chosen to knit (the Organic Baby Wrapper by Fawn Pea [reg link] [Ravelry link]) in something soft baby blue, and Lucas is planning to take the Lion Brand Hooded Baby Wrap ([LB link] [Ravelry link]) to knit on the plane for our trip to Nova Scotia this weekend. We leave Thursday; I am SO excited!
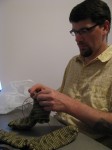
Speaking of Lucas knitting — we both have finished our pair of socks now (his first official project!!!) for our dads for Father’s Day, and our socks will be shipped off first thing in the morning. They’re gonna be a little late I think, but that’s ok. Lucas did a fantastic job; I am so proud! Here he is finishing up his second sock.
I am too excited right now to write anymore; check back tomorrow because I have some FOs (that are successes) in response to yesterday’s failure post. lol.
The Cabled Wristlet That Couldn't.
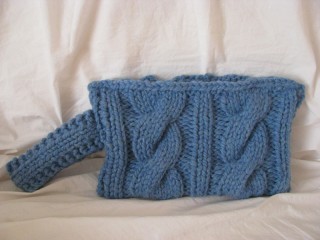
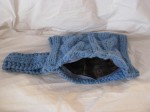
I would be a bad blogger (and a liar) if I said that everything I attempt to make turns out as planned. Or even that I never have a craft failure, cuz’ clearly I have had my share. It’s not really that this cabled wristlet I whipped up didn’t look nice when finished. I mean, it doesn’t look too bad in the pic, right? Its functionality went down the tubes somewhere along the way, though, and that’s what made this project fail on me.
I was so looking forward to this post way back when I was still designing the wristlet. I couldn’t wait to share it, couldn’t wait to finish it in time for an upcoming trip, and couldn’t wait to give you all the pattern and my instructions so you could make something equally beautiful for yourself. In my lack of design experience I missed a few key things, however.
The idea was that I wanted to try cables. I had it in my head that cables were so hard. But then I actually sat down and made myself try them. They were such a piece of cake! And wow, did I ever really love the look of cables. Cables make it seem like I’m so much fancier and so much of a better knitter than I am. They’re easy, but to the untrained or inexperienced eye, they look super intricate and difficult. Add cables to an otherwise boring knit and suddenly it’s magic and you’re a superstar! I still feel that way about cables, which is why I think this wristlet project looks nice, but it just didn’t work out when it came time to use it. I haven’t decided if I’m going to even bring it this weekend on our trip or not.
Oh ya, the trip! That was really what inspired this knit; Lucas and I are celebrating our wedding anniversary and we decided to go somewhere that neither one of us have ever been, but that we’d been wanting to see. As we’re planning to move back to the states in the somewhat near future, we decided to stay within the country and finally make a trip out to the far east coast of Canada. Nova Scotia, to be exact. We’d talked about going out there for our honeymoon last year but never got around to it. So instead we’ve decided to treat ourselves to a 4 day getaway with no real set plans and no family members nearby. We realized recently that we’ve never taken a vacation that didn’t involve visiting family or friends. Every trip we’ve ever taken together has been to visit our family either in British Columbia or Indiana, and while the trips were fantastic and we enjoyed every minute of visiting with family we don’t see very often, we decided it was high time we take a trip for just the two of us. Our plans loosely include flying into Halifax overnight Thursday and staying until late Monday afternoon. No hotels are booked yet; we are renting a car and just driving… just planing to stay wherever we end up. We do know that for Saturday, our actual anniversary date, we want to stay in a really nice bed and breakfast way up on Cape Breton Island and eat somewhere nice. The exact how, when and where is still up in the air, and believe it or not, I rather like it that way.
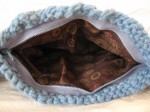
...not horrid but not the best. You can't see the "invisible" stitches, but I promise they're there.
Anyway, back on topic… this beautiful province we’re planning to visit in Latin means “New Scotland.” When the trip was planned (very recently) I realized I had just over 2 weeks to knit something to use/wear on the trip. I’m a slow knitter and have lots of things with a deadline coming up to finish, so I knew it wouldn’t be anything large and most likely I’d not have enough time to knit a shrug, either — though I’m dying to make one. I decided something cabled because for some reason, thick cables and either greens and blues sound like something that would fit in a place called “New Scotland.” Something I am really looking forward to experiencing in Nova Scotia is the Scottish flavor of music and culture that I keep hearing about up in Cape Breton. Cables make me think of (or remind me of) celtic knots in a way, and so a cabled wristlet idea was born, even if that reasoning sounds silly or illogical to anyone else.
In looking at basic cable patterns I kept seeing the same sorts of variations on a rib/cable pattern; ribbing along the sides and a cable winding up the middle. I stuck with that idea and using chunky yarn in a pretty sky blue, I whipped up a big rectangle. Wtih those cables, gah, it was just SO gorgeous. I was so proud! They looked so fancy! I folded the rectangle in half, and then to form the strap I just did a simple 6-stitches-across and repeated the rows until it was “long enough.” Design problem number one was not thinking ahead as to how that strap would stretch later on. I sewed up the side seams of the rectangle, sticking the ends of the strap inside one side seam. So far so good! I decided to line it and include a zipper, because I coudn’t very well let an open pouch dangle from my arm; all my stuff would fall out! The most secure way would include a zipper so there were no openings for my belongings to fall out through. I guess this is where the rest of the failure continued to go: I had a horrible time lining such a thick knitted pouch. I did the lining fabric pouch separately and used my machine to sew the zipper neatly to the lining. Then all I had to do was hand stitch the zipper neatly inside the knitted pouch. This all went according to plan, but the hand stitching looks awful (I even used invisible thread!) and when it was all finished, I realized how off my proportions were in the design. The handle is too long and stretches a lot, and the bag’s size is a bit big and looks a little awkward. Even with nothing IN the pouch, it’s so heavy and bulky that it makes the handle stretch, which makes the side seam of the pouch stretch in a very unflattering way. The end result really isn’t very flattering at all, to be honest.
I don’t know what I expected, but the vision in my head didn’t match up with the end result, and so to me it’s a failure. Lucas would say I was being too hard on myself, though, so maybe I shouldn’t use the word “failure” … on the bright side, I got in a lot of practice with cabling (which is my new obsession and I love it, which is automatically another ‘plus’ to the project) and so it wasn’t all bad and thus not a total failure. What do you all think? Would you make one for yourself? If so I could throw together the loose outline. Any suggestions on design changes for a future attempt or should I just leave it dead? Is the stretching as bad as I think it is?
Despite this not-so-great result with the wristlet, I did get in some really simple projects over the weekend: some dishcloths and a cabled (I told you I was obsessed) bookmark for a co-worker. More on those (with pics) later this week :)
Adventures in Sock Knitting
So as I’ve mentioned in a few previous posts, my husband Lucas has not only learned how to knit recently, but we’ve both been working together, knitting a pair of socks for each of our dads for Father’s Day. As Father’s Day is coming up very soon, I thought I’d share where we are in the process and how it’s been going.
May 9, 2009: Cast On
Lucas just learned how to knit yesterday. Let me repeat that just in case you missed the significance – he learned how to knit yesterday (May 8) and he is starting his first sock today, May 9. He learned the basic knit and purl stitches and practiced them by making a few swatches. He and I cast on our first sock for this project today — Lucas’ first project ever! I’m very impressed (and proud) that his very first project was something that most don’t attempt for at least a couple dishcloths. I’ve been knitting off and on (definitely, obsessively on recently) for nearly 3 years and I’m just attempting my first real sock that I will see through to completion. (Not counting the practice sock I posted about a few weeks ago.) We are using the free Lion Brand Men’s Grey Socks pattern.
May 22, 2009: Turning the Heel and Picking Up Gusset Stitches
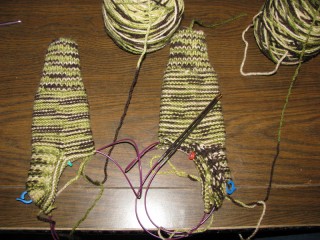
Here’s a picture after we turned our first heel of our first sock together and picked up the gusset stitches and worked them. This was approximately May 22. My sock is on the left, and Lucas’ sock is on the right. Don’t worry that his sock looks a little bigger; Lucas is using a size 5 needle while I use a size 4 needle, so it’s to be expected. We only have one interchangeable set to share, so we’re making due however we can. Although I think using a size smaller needle than the pattern suggests may come back to bite me later. (Ack! See below)
May 31, 2009: I completed my first sock
I was so excited when I got down to the end that I just had to try it on, even before I grafted/Kitchener stitched the toe closed. My concern above about how the size 4 needle (when I should be using a 5) may come back to bite me later? Let’s just say the sock fits ME perfectly. Nice and snug. The problem? The sock is supposed to fit MY DAD, who has bigger feet than I. Oops. Maybe when we block them we can stretch them a tiny bit. *crosses fingers* Lucas is currently working the foot and is nearly closing in on finishing the toe. We had another (Our friend Michelle’s birthday) project that we were trying to get done, so after doing that I went ahead and started my second sock and Lucas finished up the birthday gift project before getting back to socks. In fact, you can see the finished products (Batman soap and dishcloths) in the previous post! :) Happy Birthday, Michelle!
June 3, 2009: My pair is complete!
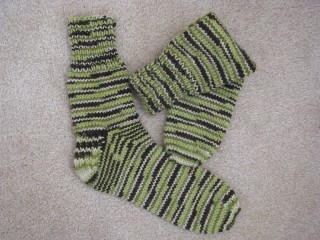
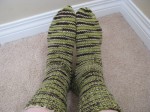
I have completed my second sock and am so excited that I have finished my first pair of socks! I know it seems like I did the second one very quickly in comparison, but to be fair, I had started the second one down to the heel turn already so it finished fast. The problem? I’m still concerned that they won’t fit my dad. Also, I’m a big loser — I did the toe wrong! You can’t tell in this photo, but I did the grafting the wrong direction. So you know how the seam should go lengthwise across your toes, from pinky to big toe? Mine goes perpindicular to that. I guess I didn’t think far enough ahead — I should’ve re-oriented the final 16 stitches on the needles differently before I started grafting in order to get the seam to lay right. This might’ve been due to the fact that the pattern we followed was meant for DPNs and it probably wasn’t mentioned because it would’ve ended up properly if we were doing it on DPNs instead of magic loop, but oh well. Chalk it up to a learning experience I guess! I feel a little silly, but it’s how we learn.
June 7, 2009: Lucas finished his first sock!
It looks fantastic and because of my mistake with the orientation of the toe seam, he is going to ensure he doesn’t follow suit. I don’t have pics of his yet, but we’ll get them up soon :) The great thing is that we’re pretty sure that Lucas’ socks will fit his dad – they almost fit Lucas, and his dad’s feet are smaller than his. Here’s hoping! I am so proud :)
It’s all going really well. I’m a little concerned that we may not finish 100% in time, but we’ll be close and I’m sure our dads will understand. (It’s our faults – though it seems like we’re going really slow on these socks, we’ve not been working on them daily like we should.) I’m a little worried that my socks may be a little small to fit my dad comfortably, too, if he can even get them on his feet. We’ll see. For our first socks, I think we’ve done great and there’s something really amazing about seeing all of the parts — cuff, leg, heel, gussets, foot and toe — all come together to form something so simple and normal that we wear every day. I don’t think I’ll ever look at another sock the same way again. I also know I didn’t want to take the sock off when I tried it on. There really is something magical about handmade socks. I think a pair for myself is in order soon, don’t you think? (With proper toe seams, LOL)
DIY: Batman Soap Tutorial
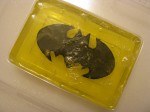
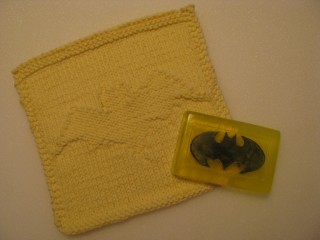
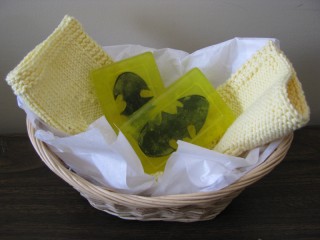
I realize that crafting Batman soap does not seem like something you’d find at The Pink Toque craft blog, but rest assured you’re still at the right blog, and today we’re going to do something ‘different’. Soapmaking is a lot of fun – I spent a brief period back at Indiana University playing with the very basics of making handmade soap. When I was trying to come up with a great gift idea for my good friend Michelle (whose birthday is coming up on Monday) I immediately thought of knitting her something, since of course that’s the craft I’ve been doing a lot of lately. I should also mention that Michelle loves Batman. (That’s kinda an important point to this story.) So then I was thinking knitting + Batman. (Awwe, knitting + Batman forever!) I came up with the idea of knitted washcloths with the Batman logo on them. (Side note: I was unable to find a pattern for this already, but the Batty Dishcloth by BlackRayne is pretty close and looks good in yellow cotton!) And then I remembered how I made basic soaps back in university and envisioned a way to incorporate the Batman logo into the project so that I could create a Batman cloth and soap set for Michelle. So now you have the backstory, and now I can get on to the DIY part!
Materials:
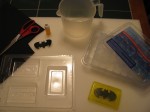
First of all, let’s talk about materials. I mentioned that this is very basic soapmaking. It is. It’s very easy. We’re talking about melt, pour and voila here, people. I made my first Batman soap last night in about 15-20 minutes, including prep time. Head on over to Michaels (or your local craft store) and find the soapmaking aisle and pick up the following items:
1. Glycerin – “bricks” of clear or creamy white glycerin is sold usually in 2lb plastic containers like you see in the materials photo. (Click here to see what mine looks like.) Pick up some of the clear, since you want to be able to see the Batman logo when you’re done.
2. Soap coloring – this is packaged similarly to food coloring and the little bottles of color look just like it. It says it’s specially formulated for soap making, though, and since food coloring stains my hands and I’m not sure if the color will stain your skin when you use the soap, I go ahead and pick up specially made/packaged soap coloring instead of risking food coloring, just in case. Grab a little bottle of yellow. You’ll only be using a few drops per bar, so this stuff will last a long, long time.
3. Soap mold – there are likely several various plastic soap molds there in the soapmaking aisle – I just chose a plain and basic rectangular soap mold shape; approximately 4 inches wide by 2.5
4. Black foam – in the kids craft aisle I found a single sheet of black craft foam. It’s around the thickness of a piece of posterboard, maybe a little thicker, for $0.99. This is what we’ll make the logo out of.
That’s all you need from the store. You most likely already have a computer at home to grab the logo template with for printing, scissors for cutting out the logo, and a small container or liquid measuring cup to microwave and stir hot liquid soap in. It’s also recommended to grab a little spray bottle with rubbing alcohol in it. These spritzer bottles can be recycled from an old one you have at home (make sure it’s been thoroughly cleaned!) or you can get a cheap one in the travel aisle of your local grocery store or Wal-Mart, for example. Rubbing alcohol can be found in the beauty/pharmacy department of your local store, too. It’s commonly found with peroxide. Ok now let’s get started!
Directions:
1. Print off the logo template I’ve made onto regular paper. I made my logo to be around 3 inches wide x 1 inch tall so that it will fit nicely in the center of my rectangle of soap.
2. Cut out the logo carefully. Lay it on the black craft foam and trace with a pencil. It may seem like you won’t be able to see the pencil lines, but trust me – you will.
3. Cut out the logo shape from the black craft foam. This is getting very Batman very quickly.
4. Open your brick of clear glycerin. It’s usually scored for you so you can cut off even sized chunks. I found that one complete slice along the short side of the brick was the perfect amount for one bar of soap. See the materials picture to see where I cut mine if I don’t make sense. Using a butter knife (this is where kids will need help if kids are involved!) slice off a chunk of glycerin.
5. Microwave your chunk of glycerin in a small microwaveable bowl OR liquid measuring cup. I recommend using something like your Pyrex or plastic liquid measuring cup since it has a lip that will make pouring the hot liquid soap later much easier. For the amount I sliced off, this only took around 30 seconds on high. You will have hot liquid soap in no time! Do a little Batman jig while you wait. I’m not sure what a Batman jig would look like, but if you do one, please be sure to YouTube it.
6. Squeeze 5 drops of yellow soap coloring into the liquid soap and stir. I found 5 drops to be adequate to get the color I was looking for, but feel free to use more or less as desired.
7. Now pour (see why using a liquid measuring cup was recommended?) your yellow liquid soap into the soap mold BUT ONLY FILL IT HALFWAY. Reserve the remainder of the yellow liquid soap and set it aside. If you see any air bubbles in your mold, gently use a toothpick or the end of the knife you used to cut the glycerin with to swirl them out. You can also use the spray bottle of rubbing alcohol and lightly mist the surface of the soap to remove air bubbles.
8. Wait 10 minutes. You could put the mold in the fridge while you’re waiting if you’d like, but it’s not necessary. You’d be surprised at how fast this stuff hardens! This is also an excellent time to upload that YouTube vid of you doing the Batman jig from earlier.
9. The soap in the mold should be solidified enough for the next step at this point. If the reserve liquid soap has hardened during the 10 minutes (which it will have), pop it back in the microwave to re-liquify it for 15 seconds or so. Now we’re going to add the logo. A note on that:
Basically what you’re doing is layering; creating two layers of soap and placing the foam Batman logo in between the two. You let the first layer harden enough to add the logo, then pour the remainder of the liquid soap on top and let the whole thing harden so that your logo is “trapped” between the two soap layers and therefore in the middle of the soap.
**FIRST** Using your mini spray bottle of rubbing alcohol, gently spritz the hardened surface of hardened layer one. This will ensure the two layers don’t separate later. OK now on with the show…
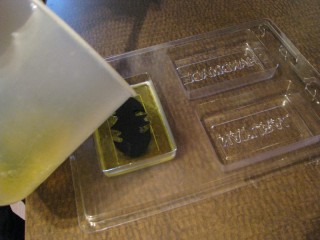
10. Pour a DROP of hot liquid soap in the center of your mold, on top of the hardened first layer. This drop of liquid soap will act like “glue” to hold your logo in place. Gently place your logo on top of the first layer, pressing on it gently so the liquid soap spreads out and helps the logo stick to that first layer. Now gently pour the remainder of the hot liquid soap on top of the logo to fill up the mold and create the second layer. Again, if there are any air bubbles on the surface, swirl them out with a toothpick or something so that the soap hardens as smooth as possible. And again, you can also use the spray bottle of rubbing alcohol and lightly mist the surface of the soap to remove air bubbles.
Let your soap sit overnight to completely cool and harden. In the morning you will be delighted to see your finished soap! Turn the mold over and gently pop it out. Voila! You now have awesome Batman soap.
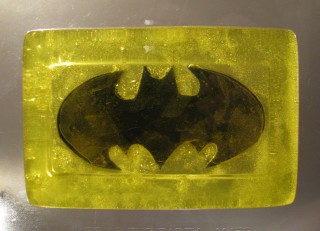
This method would work for lots of things, so use your imagination! I hope you enjoyed the tutorial :) And I hope Michelle loves her handcrafted Batman soap! I took a picture of the first bar alongside the first knitted Batman cloth. Lucas is making a second cloth and we’ll make a second bar of Batman soap to go with it. This gift will truly be completely handmade from both of us :)
Tutorial edited 6/6/09 to add in information about using a spray bottle of rubbing alcohol to help with air bubbles in the soap and in between the layers, thanks to comments below from Gina and suggestions on Craftster, where this tutorial was also posted. Thanks! :)
Tickled Pink (And Blue and Green)
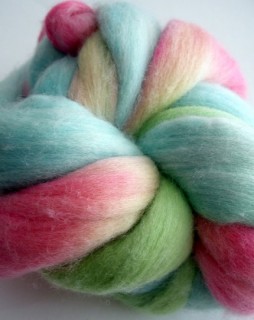
I’m just tickled to have been one of the winners of the lovely and talented Daniella of DaniDo Crafty‘s Handmade News scavenger hunt contest last week. I’m tickled pink… and blue… and green… because I chose as my prize some of her absolutely gorgeous Superwash Merino roving. And the colorway? Please Clap Your Hands! (Seen pictured here. Photo copyright to Daniella!) Way too fun! This excites me because I’ve been wanting to spin; if you recall in a previous post, I had purchased a top whorl (and bottom whorl) drop spindle kit that came with some plain white wool roving to work with. I’ve been so busy with Mother’s Day and Father’s Day knitting projects that I haven’t had a chance to sit down and give it a whi(o)rl. (See what I did there?) Then in walks an opportunity to work with Daniella’s beautiful Please Clap Your Hands roving, and I’m inspired to make time for spinning. No more putting it off — once this fabulous merino arrives I’ve got no excuses; I can’t let such beauty go wasted and unused. It will be loved, I tell you, LOVED! And hopefully (*fingers crossed*) spun into something that I can knit into something fantastic. I’m also a little embarrased to admit I’ve never worked with merino before; so even more reason to be excited about such an opportunity to work with something so awesome.
Special thanks to Daniella for the contest and the wonderful prizes. I truly am tickled. You should definitely check out her site, Danido Crafty! as well as her Etsy and Artfire shops. You’ll love the free patterns on her site and all of the beautiful handspun and hand-dyed yarn and roving (among other things) that she has available in her shops. She’s also a writer over on Handmade News and guess what she writes about? Inspiration! Perfect, as her contest to hunt all over Handmade News last week had me finding articles that I may not have otherwise read, and so many great ideas — all very inspiring! Thanks again, Daniella!
Podcast Haiku
As I mentioned in a previous post, I recently acquired my first real MP3 player. I’ll mostly spare you from the horrid details of my problems with the Zune MP3 player that I purchased first… let’s just say the Microsoft proprietary software you are forced to use to sync your files with the player has a long way to go to reach a level of acceptable user friendliness. I took it back and picked up an 8GB Sony (Walkman) MP3 player; the same brand and type my husband has.  And now, a haiku, to express my love for this new gadget.
Ode to my Sony MP3 Player
Thanks Sony player
Music, podcasts, video
Doesn’t suck like Zune
And now, I want to point out the highlighted word in my haiku that inspired today’s post. Podcasts. This is a fairly new concept for me; digital media in a series, web syndicated.  Like a radio show, but broadcasted online for you to download and put on your MP3 player and listen on the go. And when I started looking around for knitting related podcasts, I was overwhelmed by just how many podcasts there are out there for just about anything and everything you can imagine. Some series are updated weekly, monthly, and in each little segment or show, there’s obviously a main topic related to the subject of the podcast that gets discussed. I don’t know why it never really occured to me to listen to podcasts before; perhaps it has to do with the fact I’ve never owned a portable media device before. I know that’s not a requirement since you can just listen on the web, but using a portable digital media device is where it’s at. I can take the Cast On podcast (knitting) or Epic Dolls podcast (gaming) with me wherever I go and get updated on new segments in the series just like I do with bloggers out there like the Yarn Harlot or KnitPurlGurl that I follow with Google Reader, for example. KnitPurlGurl has her own mom and fiber podcast, too. I find this whole thing fascinating. And I also feel a little noobish that I’m so late to the game on this.
Check out what I’m listening to and see my subscriptions, add me as a friend, or suggest podcasts you think I’d be interested in over at Podcast.com! I don’t use iTunes, as much as it’s promoted and hyped up, because when I tried to browse podcasts there it wanted me to download and install the iTunes app to use like a “store’ to shop for things instead. I don’t want to add more proprietary software to my computer; that was my main problem with the Microsoft Zune. If I can’t browse and download your selections online (via website, and not an additional required application that connects to a website) to then just drag and drop onto my MP3 player, I’m not interested. I don’t need another media player on my computer and I don’t have an actual iPod to sync, so it’s all pointless to me. But I digress.
If you have any podcast goodness you think I should be listening to, let me know! :)
