Ellie the Sock Elephant
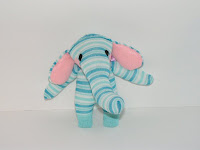
Lisa of Q.D. Patooties made the tutorial and I just picked out great kiddie socks and followed it. Lucas’ mom loves the color blue and collects elephants, so when I found these socks I knew it was just meant to be.
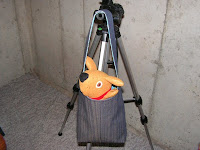
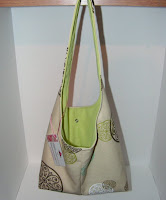
It’s May long weekend in celebration of Victoria Day on Monday here in Canada, so I’m enjoying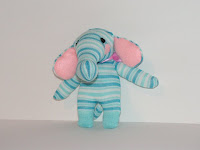 a relaxing weekend before I head out to Indiana next week. I leave early Thursday morning, so I’ve got a couple days to finish a few projects up before then. This weekend I made Ellie, a little dog bed/pillow to give to my brother and his fiancee for their two new Dachshund puppies, and I made a new bag for one of Lucas’ co-workers based on an old bag that she had. I’m trying to think ahead, and Father’s Day is the next big thing coming up that I need to craft for… we get back from Indiana on June 7, and Father’s Day is a little over a week after that, so I need to plan now to ensure whatever I make will get to my dad on time due to shipping. I was thinking about trying to learn how to make felt or fleece slippers, so maybe that’s what I’ll do!
See you in a few weeks!
It's Official: I'm Official!
This isn’t “craft” related, but it is something so big that has such a huge impact on my life in general that I just must share :)
So the day we’ve been waiting 9 months for finally arrived: as of today, May 17, 2007… I am an official Permanent Resident of Canada! As I reported a few posts ago, I received notification at the end of April/first of May that I was approved for Permanent Residency, but today was the actual day I went in to the Calgary Immigration office to be granted the official status.
I know there was no reason to be nervous, but my stomach was doing flip flops all morning. I kept worrying that I would forget some important piece of ID, or the photos I had to have done wouldn’t be perfectly to spec… I was just worrying that SOMETHING silly would go wrong and they’d reject me. It all went off without a hitch, of course, there was just a lot of waiting.
I took a train downtown and met Lucas at his office and we walked to the government building where we waited for about an hour for my name to be called. We spent more time waiting than the actual “interview” took – I basically went into this tiny room to sign papers and that was it. The woman asked me a couple of simple questions, but they were all things that were listed on the document in front of me anyway, lol. I signed everything and she gave me my copy of the paperwork; this piece of paper I will guard with my life, as it is not only a temporary placeholder for the actual Permanent Resident card that I will receive in the mail in a few weeks, but also something I will need to keep for future dealings with the immigration office. This document doesn’t guarantee anything for travel purposes, but I’m still taking my trip to Indiana next week. The teeeeeny tiny slim chance they’ll give me a hard time once I’m back in Canada on the way home since I don’t physically have the card in my hand doesn’t really worry me; after all, I am legally a permanent resident now. Worst case scenario is I’ll have to spend a little longer in Indiana or they’ll scold me and make going through customs once I’m back in Calgary take a little longer than usual, but it’s really a non-issue. Nothing we can’t handle. It’s been nearly a year now since I’ve seen my family (I hit my year mark just before I leave Indiana to come back), and now that I possess official status, I’ve gotta see them. I miss my little brother the most, but don’t tell him that or I’ll totally deny it. You know how it is.
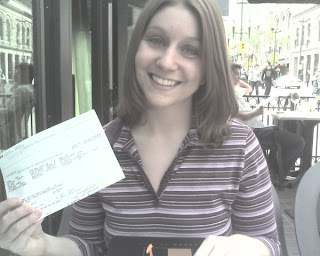
So ya, it’s been an exciting day! We went to a restaurant called Milestones afterwards; fitting, if you ask me. Lucas took that great picture above of me holding up my Permanent Resident document at the restaurant as we celebrated. We came home and celebrated with Oliver, and now we’re going out for ice cream! Oliver seems a little confused because we kept telling him he was now officially a permanent dog resident of Canada, but he didn’t seem to mind not understanding what we were talking about since he was getting lots of attention over it. “Whatever you say, mom, just keep hugging me!”
In the near future our plans include getting me all packed for my trip to Indiana next week; I leave Thursday. Because it’s a big deadline, black-out-date period for Lucas at work, he has to wait a week before he can come down, but he’ll be joining me in Indiana with my family the following Thursday and staying the full second week with me at my parents’ house. Our itinerary is pretty full, and once Lucas arrives, starts off with Tripoly night with my parents and taking Herm out for a belated 21st birthday celebration and college graduation celebration. I can’t wait to see everyone!
Pouches Galore
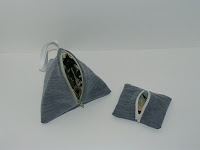 Recently Lucas and I were doing some spring cleaning and filling up a bag of old clothes to take to Goodwill. I saved an old pair of jeans and shirt of his that I loved and promised to reconstruct them into something new and useful. This set is what I’ve done with the jeans and shirt so far. On the left is a Canmore Wristlet, and on the right is a Canmore Coin Cube. Each have denim outer fabrics from his old jeans and are lined with his old blue and green “hawaiian” print shirt.
Last night our roommate came home in a panic because he had been invited to a birthday party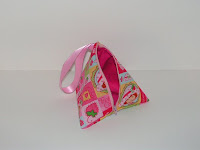 for his good friend’s young daughter today and needed a gift. He had no idea what to get for a little girl, so I whipped up this Canmore Wristlet for him to give to her, made from Strawberry Shortcake fabric. What little girl wouldn’t love a mini pouch or purse she can carry around all of her little stuff in?
And now I think I really need to focus on my knitting. A few weeks ago, Lucas’ mom was in town and she taught me the very basics — casting on and the basic English knitting stitch. I’m trying to teach myself binding off and increasing/decreasing from KnittingHelp.com and KnitWitch Instructional Videos, but I’ve been so busy making little things and getting prepared for my trip to Indiana that I’ve put off practicing and learning new techniques. I’d love to be able to practice knitting on the plane, but I have a feeling knitting needles won’t be allowed in my carry-on bag. Oh, well.
New Purses
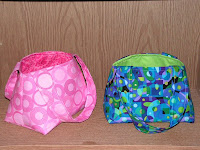
My store website opened last week and I’ve had several orders to fill. The most recent order I completed was for a hobo-type bag that I call the “Brooks” purse. It’s got a fairly neutral, sturdy outer fabric and is lined with celery green on the inside. It closes with a snap. I hope I end up with a happy customer!
The next set is my favorite! Some of you know that I moved to Canada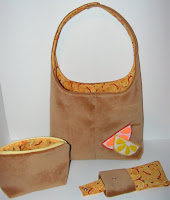 last June. 9 months ago I applied for my Permanent Resident Card, and I just recently got news that I was approved. Exactly one week from today I get to go pick up my Permanent Resident Card and I’ll be all official. That means that I can take a trip back to the States to visit my family, and exactly two weeks from today I am traveling to Indiana to do just that, for the first time in a year. I’m so excited about my trip and getting to see my family and friends from back home that I wanted to make a new matching purse set just for the occasion. This is what I came up with.
The purse is another “Brooks”, the lined zipper pouch is a “Gadsby”, and the sunglasses case I refer to as a “Sundre.” (all cities in Alberta). They’re all available on my store website if you’re interested. I was wanting to make something new to use on my vacation, and the citrus liner fabric inspired the whole matching set. I even made the two little citrus-y felt appliques that you see on the front, and then I hand sewed them on. The purse and the glasses case both close with a snap, and I put the perfect sized pocket that I divided up into a cell phone section and a place to store pens, because those are the two things I tend to lose easily in the sea that is the bottom of my purses. Woohoo!
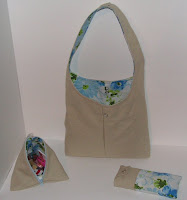 I made another matching set this week, again, I felt like I needed something fresh and new to use as Spring finally showed Calgary some love. I enjoy the ease of the Brooks purse because I can throw it over my shoulder and have my hands free, and it’s large enough that I can put loads of stuff in it. I used canvas for this set on the outside, and it’s lined with remnant fabric that I found at a thrift store when Lucas’ mom and I went shopping back when she was visiting us a few weeks ago. I think the combination is very fresh and crisp, and it’s been a breeze carrying all my stuff around. This set has a Brooks, another Sundre, and the little triangular pouch is called a “Canmore.” After using this for the first time yesterday when I went downtown to meet up with a friend of ours for dinner, I fell in love with the simplicity and functionality of the Brooks. It’s perfect for running errands or being oot and aboot. I’m glad I made my vacation set feature a Brooks design, too. It seems like it’ll be great for all the running around I plan to do when I’m in Indiana.
Alright, that’s about it for now. But never fear… there’s always more to come! :)
It's Been Too Long! What's New…
Wow! It’s been so long since I’ve last posted, I’m way behind on sharing! There’s so much new to share so I better get started. First of all, my online store opened on Friday of last week, and I’ve already got 5 orders I’m in the process of filling. The web address is http://shop.pinktoque.com :)
Most recently I’ve worked on Lucas’ mom’s Mother’s Day gift. I made my mom a purse and already shipped it, but we worked on Lucas’ mom’s gift this weekend and I shipped it today. She likes Scrabble, so I came up with an idea to make a plush Scrabble board turned into a pillow.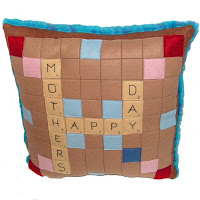
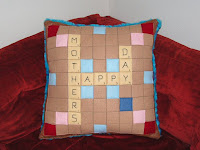 The back is made from soft fuzzy “monster fur” to make it more snuggly. Isn’t it great?
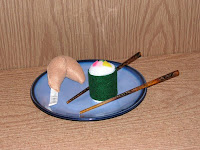
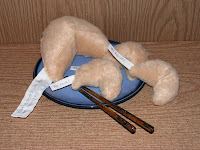
Back to my obsession with plush food… Last week I crafted some homemade plush sushi and fortune cookies. The fortune cookies can come with various personalized messages. I’m selling them now at my online shop.
And speaking of plush food, my plush cake and donuts are officially on display at the Cafe Kino exhibit in the UK this week. The exhibit of fake food runs until the first week of June. My cake already sold, so that’s great! I get 100% of the profit from selling my items, so the cake alone will more than cover the shipping fees I spent to send the items out there. Yay for already being ahead on the first week of the exhibit!
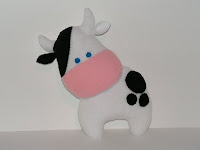
Meet Bernard Moo! He’s a cow that I designed and made from baby soft fleece. Isn’t he sweet? He has a counterpart named Betsy that is designed in my head, but I just haven’t gotten around to making her yet.
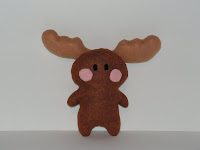
I also made a new moose plushie and named her Matilda :)
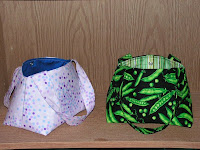
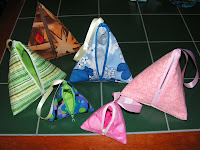
Here are a couple of the new purses and pouches that I’ve made. The purses are all “Banffs” and the pouches are called “Canmores”. Pictured are Canmore Wristlets and Canmore Coin Pockets (slightly smaller than the wristlets.)
Whew! I think that’s it crafting-wise! My application for Permanent Residence here in Canada was approved last week, and my appointment to pick up my Permanent Residency Card is set for May 17th. YAY ME! I’ll be all official and able to finally work again this month :) It’s been nearly a year since I’ve seen my family, so I booked flights today to make a trip back to Indiana to see family and friends on May 24th. I’ll be staying a full 2 weeks. Since it’s a black-out deadline period for Lucas at work, he’ll fly out separately and meet me down in Indiana on May 31st and spend the second whole week with me. We’ll fly back together on June 7, just in time to celebrate my one-year-in-Canada anniversary :) What an exciting month it’s been so far!
Tutorial: Handpainted Photo Bottlecap Magnets
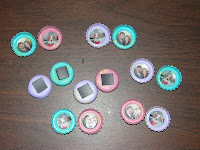 So earlier this week I finished up my Easter gifts – stuffed bunnies holding little plastic eggs. I made magnet sets to stick inside the little eggs as little additional gifts for Lucas and I’s family and friends. Here’s how I made them!
Materials
bottlecaps
acrylic paint
paintbrushes
small photos
Mod Podge
magnets
super glue
Optional Materials
toothbrush
Gather your materials and wash your bottlecaps thoroughly. Nothing worse than giving a painted photo bottlecap magnet to your grandmother who starts asking where that beer smell is coming from. I found that by soaking my bottlecaps in hot sudsy water first, it was a breeze to clean them. Rinse clean and let them dry completely.
Step 1
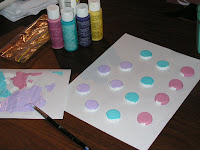
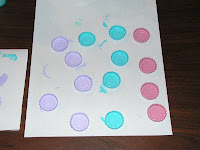
Let’s paint your bottlecaps! I started by giving each one a primer coat of white, then once that was dry, I painted each one individually with a coat of acrylic paint in my desired color choice.
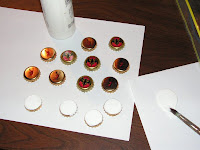 Optionally you could spray paint your bottlecaps or dip them in paint if you’re in a hurry or if that’s easier for you. If you choose to spray paint, be sure to do it in a well ventilated area, preferrably outdoors.
Step 2
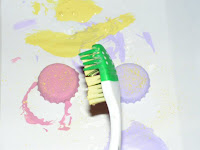
Once each bottlecap has its main coat, you may wish to also do this optional step to add a little flair to your flat color caps. I dipped an old toothbrush into yellow paint and held it close to the bottlecaps and then ran my finger up and down the brush part. This creates a great speckling effect, and gave my finished bottlecaps a little added yellow speckled flair.
Step 3
Let your bottlecaps dry thoroughly. While they’re drying, it’s time to plan out what images you are going to use as your magnet subject. My magnets are going to be given as mini spring/Easter gifts for friends and family, so I chose to use little photos of Lucas and I and our dog, Oliver. Small photos give your magnets a personal touch, but small stickers or even just handpainting a design works well, too. So do images found in magazines.
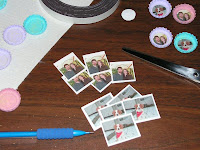 Before cutting up pictures, I made a template circle and cut it to fit the insides of each bottlecap. Once I had a template, I traced the shape onto my photos, then cut them out and tailored each to be sure they fit exactly how I wanted them to.
Step 4
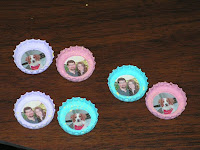
Here’s where the Mod Podge comes in. I chose Mod Podge because it’s both a glue and a sealant, and that’s really helpful for this project. Mod Podge comes in matte, glossy or sparkle finishes, so choose the one that best fits your project’s style. I chose matte for this project. First, using a paintbrush, I applied Mod Podge to the inner circle of my bottlecap where the photo goes.
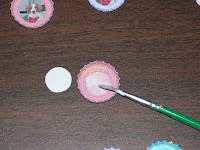 Next I gently eased the photo into its spot with my fingernail. Once the photo was glued into place, I then used the Mod Podge applied thinly over the entire inside of the bottlecap, including the photo. That’s right – paint Mod Podge right over the photo and the inner side of the cap. It will look funny at first, but don’t worry- Mod Podge dries clear. Just be sure you don’t heap on globs of it, or it won’t dry as well or as neat. Beware if you’re using cheap plastic paintbrushes that tend to lose their bristles easily… you don’t want a strand of paintbrush “hair” in your finished project.
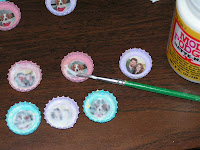 Set your bottlecaps aside to dry. This process can take anywhere from 30 – 60 minutes, depending on how thick you applied the Mod Podge. Thicker coats take a bit longer to dry thoroughly.
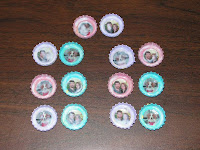 While the inside of your bottlecaps are drying, you may wish to flip them over now and apply a thin coat of Mod Podge to the outside of the bottlecap. This gives your finished project a uniform look and helps seal the paint. If you’re using glossy or sparkle finish Mod Podge, you’ll definitely want to do this.
Step 5
Once everything is dry, it’s time to apply the magnets! I bought a long roll of magnet where you peel off the backing to reveal a sticky back. You can cut the magnets into your own chosen sizes. I cut up the magnets into small squares that fit nicely on the back of each bottlecap. I removed the backing, but added extra strength to the stickiness by adding a dab of super glue before applying. Affix magnets to the backside of your bottlecaps and allow the glue to dry completely before use.
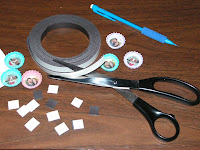
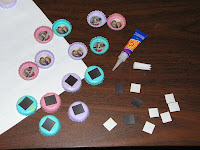
Voila! You now have handpainted photo bottlecap magnets to use on your refrigerator or share with family and friends! Experiment with different images, colors, and Mod Podge finishes to make unique magnets that suit your style. Make a set of Christmas magnets or Valentine’s Day magnets, or just make some that match the decor of your kitchen. They’re quick and easy to make in large quantities, and make a great gift. :)
Whew! It took longer to insert all the images into Blogger than it did to write the tutorial up. Is there a trick to inserting images so you don’t have to go to the top and drag them down to the correct place where you want them inserted into your paragraph each time? Maybe I’m missing something, but it’s really annoying when you have a fairly long blog post and lots of images to insert throughout. Why they always default to the top and I have to drag them down is beyond me. Maybe I’m just doing it the hard way?
Oodles of Bunnies
Well, it’s officially Spring and Easter isn’t too far off… so I’ve been busy with an Easter project that involves bunnies, and then bunnies also became the theme of a set of gifts we sent off to various couples that we know who are expecting this year.
First, the “baby” bunnies
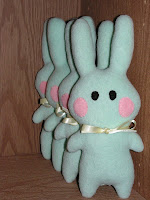
These little guys are 10 inches tall and made from mint green fleece. They have peachy fleece cheeks and felt eyes, all handsewn on. We know 4 couples that are due this year, including 2 from our families (Lucas’ brother, my cousin) and so we wanted to send something cute and cuddly to congratulate them and wish them luck. Don’t worry, I added a note to the tag to remind the expecting parents to remove the ribbon before giving to a little one. (because someone always asks.)
So there are the first 4 of a total of 12 bunnies I’ve made in the past week. Next up, the Easter bunnies! These will be gifts to our family members – my family in Indiana, and Lucas’ family in BC. At the time of this writing I’ve got 4 of 8 completely finished and the last 4 are halfway done and just in need of some facial features and accessories.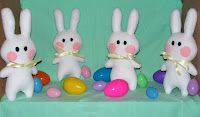
Made from the same template, these are also about 10 inches tall and made from fleece with the same fleece and felt features. The biggest difference here isn’t the color of the bunnies, but the fact that they come bearing gifts! In the left hand of each bunny you can see that it’s hol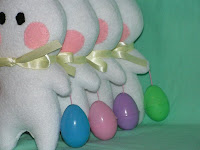 ding a string, and hanging from the string is a tiny plastic Easter egg. Each egg has little hinges that allow you to open it and stick lots of goodies inside. An Easter gift that carries additional gifts… how genius! The real genius with this idea was Lucas, who saw the plastic eggs in a large variety pack at Michael’s this weekend. I was originally just going to make 2D eggs from felt to have each bunny hold in their hand, but he saw these eggs and noticed that each had a pinhole in the top so I could easily string them up and sew the string to the bunnies’ hands instead. I think they turned out much better this way!
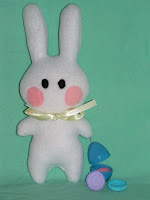 So what kinds of goodies do I plan to put inside? I originally decided to make a set of spring magnets to put in the eggs using the glass pendant technique I described in an earlier blog. Lucas (always the genius and such a supporter of my crafts) suggested putting each of our faces on one and our dog’s face on one to make a complete set of 3 magnets. The small pictures of us aren’t showing up very well using the glass pendant idea, so I pulled out the bottlecaps I’d saved from our last poker night and started painting them. The idea is that I’ll put a photo of each of us inside the painted bottlecaps, gloss and seal them, and then glue the magnet on the back. They’re a work in progress, though. So far I have only painted the bottlecaps. Eventually each bunny will be bearing gifts of magnet sets ;)
Whew! I think once I’m done with all of this and have shipped off the last bunny I won’t be making anything that has to do with bunnies for a very long time.
Simon the Claustrophobic Turtle
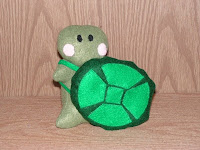
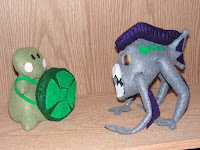
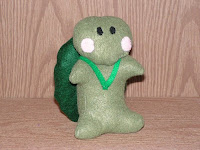 Meet Simon the Claustrophobic Turtle. You might think that the idea of a claustrophobic turtle is funny, but to Simon it’s definitely no laughing matter! Because of his affliction, he wears his shell like a backpack instead of retreating inside of it when there’s danger. So how does Simon protect himself if he never goes inside his shell? Why, he takes his shell off his back and uses it like a shield, of course!
Watch out for that angry murloc, Simon!!
Simon is made from felt and stands 6.5 inches tall and is 4.5 inches wide. He is a special present for my little (21 year old) brother, who actually has a live pet turtle named Simon, the inspiration for this project and its name. More pics from different angles here.
Plush House Ornament with Tutorial
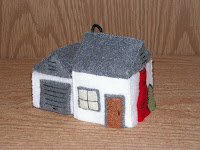 Some good friends of ours just got engaged AND they bought a house and move in on April 1st. They have a thing for Christmas tree ornaments, so I decided to make them a little congratulations gift for their engagement and their new house by making them a little plush house… ornament :)
I had the idea the other night when I went to bed, and layed awake making a list in my head and designing the house and how I would make it and put it together in my head. (my brain never sleeps it seems.) The next morning I started working on it. I don’t have a pattern to share since it’s just a bunch of squares/rectangles with a couple triangles, but I did take a lot of pictures along the way to give you an idea of what I did so I could present a half-tutorial for anyone that might want to make one for themselves :)
Plush House Tutorial
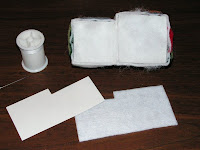
First I cut out the pieces – no bottoms or tops for the square that made up the shape of the house nor the rectangle that made up the garage: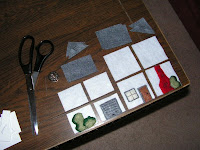 Every little item like the bushes, fireplace, window and door was cut by hand from felt and carefully handsewed on. No machine on this one! It’s way too small and intricate for my personal sewing machine abilities, anyway. I’m digging the handmade look that the showing stitches give it, though.
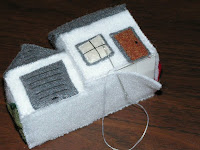
I formed the roofs and then started putting the walls together:
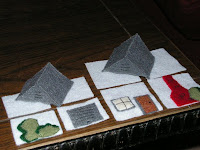
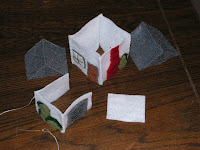
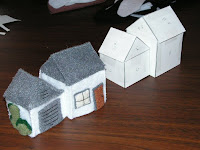
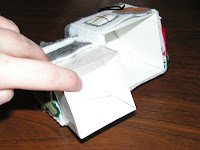
Voila! I forgot to mention that just before I inserted the cardboard supports in the house that I used embroidery floss to make the hanging loop, and knotted it well inside so it’d not come out. I chose a spot in the roof that was somewhat centered as far as the entire final piece goes so it’d hang as evenly as possible.
And that’s it! This is a really basic house – if you use your imagination you could make many more squares and rectangles and make your house much bigger and more complex. It’s all up to you! I hope that our friends like it! :) The cardboard inserts and polyfil really makes it sturdy and hold its shape well. I’m really happy with it!
Maple the Miniature Moose
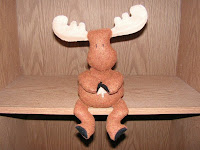 Maple is a legend (to me) and she doesn’t even know it.
Much to the dismay of my close-knit family, I moved 1800 miles away from my hometown in Indiana to Calgary, AB Canada back in June of 2006. No regrets… it was one of the greatest decisions I’ve ever made, and I am now living happily ever after here and am really happy :)
I planned to make a trip back to Indiana to visit my family at Christmas, but by the time October came around, I realized that the Canadian Immigration process takes much longer than I had anticipated, and I had to accept that I’d not be able to make the trip as planned. Instead, I decided I’d handmake something soft and huggable to send home to my family members in my place for Christmas.
I’ve always been crafty, but I’d not done much with plushies, let alone made a pattern for what’s in my head. Back in 1995 I created a group of storybook characters for a children’s book project that I wrote and illustrated. It wasn’t until 1998 that I finally got the series of characters copyrighted, and by that time I had written several children’s books that I’d also illustrated using these little characters. (I never pursued getting the books published – that college thing and starting my teaching career was a bit more important.) Anyway, my family was well acquainted with the whole gang because I used the characters on the front of all the handmade cards I’d made for various occasions. They were “famous” to my family and friends.
So here I was, back in October, trying to come up with what I’d make for my family for Christmas that could be hugged in my place since I couldn’t make the trip personally. I wanted something that was somewhat representative of Canada since that’s where I was, and it hit me… Montgomery Moose! One of the characters from my little series seemed perfect. The problem was capturing the original drawing of Montgomery in a plushie pattern… something I had no experience with. I knew how Montgomery needed to look when finished, but creating a pattern that preserved that look was harder than it seemed. I tried, but it didn’t seem to be quite right. I was talking to a new friend here in Calgary who told me to check this great crafti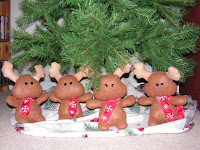 ng forum, Craftster, and see if I could find a pattern or someone else who had made a moose plushie before to give me a hand or help critique the pattern I’d tried to make. And the rest is history. Here is my original post (one of my first!) looking for a moose pattern. In the end, I scrapped the pattern I’d made and modified a plushie pattern from a japanese crafting book that sewingstars had posted in another thread, and I was happy with how the new Montgomery turned out. I then crafted 4 that got sent to my family back in Indiana for Christmas. They were a hit!
So where does Maple come in? Well, today I was cleaning out my craft pattern drawer and trying to organize. I found the original sketches of Montgomery Moose from back in October – my first attempt at a pattern – and I decided to finish that original moose that never came to be. I also decided to name it Maple instead, since I’d made a little maple leaf cut-out to put on her tummy… it seemed more fitting. Now that she’s done, and not to mention now that I’ve had several months’ worth of experience in making plushies and even drafting my own patterns now (thanks to the great people of Craftster and their support!), I can see where I’d make changes now in order to get her to look just right. I know what I’d do differently “next time”, and if there is a next time with this pattern, I know I’d make it better. But for now, the one-and-only original Maple will sit here next to me at the computer so that I never forget where I’ve been and where I’m going… in life and on many other different levels, too.
Maple is made of felt, and for this project I completely sewed her by hand because it only seemed natural… when I designed Maple’s pattern, I didn’t have my sewing machine yet, so I would’ve sewn her by hand anyway. The one arm and leg that I’d already started on before scrapping the project was handsewn, so I made sure the rest was done just the same.
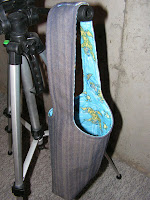 What else did I do this weekend craft-wise? Well I made a decorative gift bag to package up my Stuffiepup for craftymumto2 so I can send it to her this week. It’s denim on the outside and lined with cute spring Scooby-Doo fabric that has Scooby-Doo wearing a raincoat and playing in puddles with a little yellow duck. I love it! And I hope she does, too :)