Our Holiday Crafting Round Up!
 Note: This post was originally posted at our family blog, since all of our holiday crafting this year was a family affair.
It’s been a magical couple of weeks home on winter break, and we spent a lot of time crafting for various projects (both Christmas gift related and baby Lila related) and getting ready for baby Lila’s arrival next month.
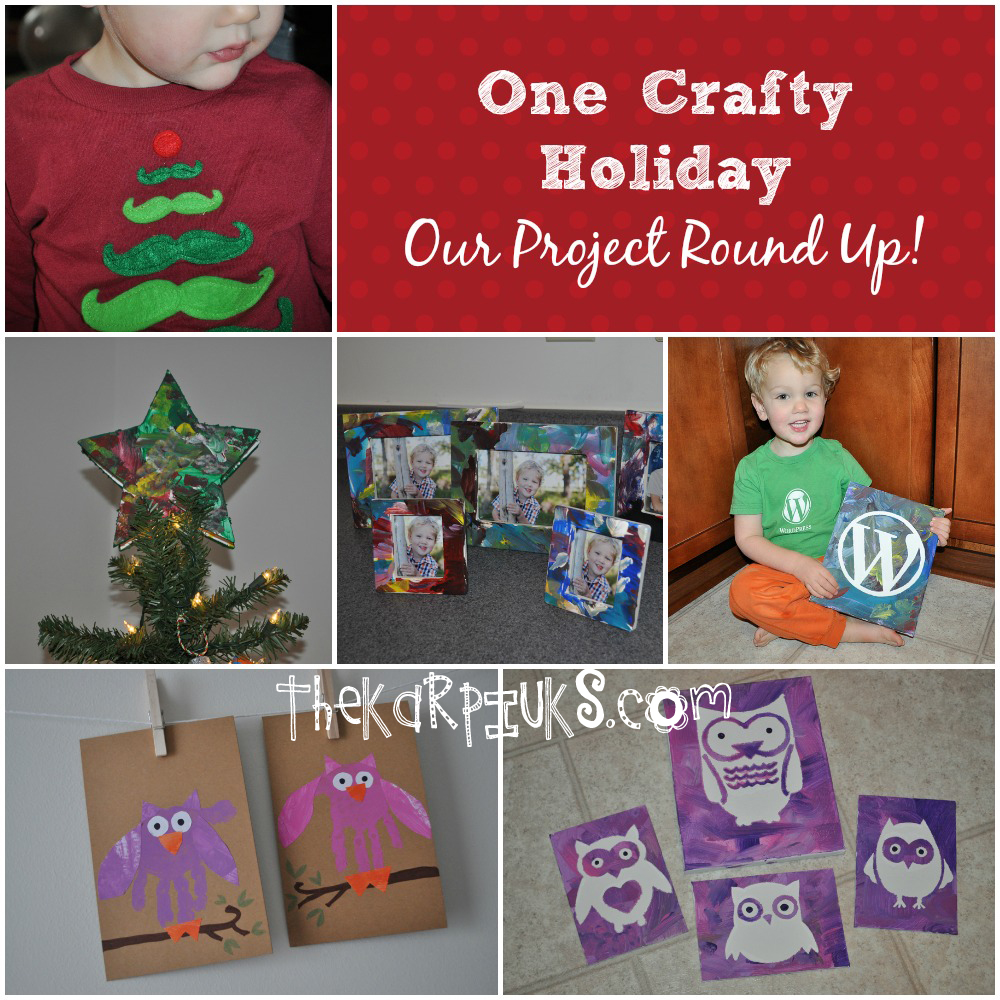
When all was said and done, we made six different projects in addition to baking and decorating Christmas cookies together or just coloring. From tree toppers and mustache Christmas tree shirts to canvas stencil paintings, frames, and hand print owls… we had fun getting messy! Here’s our round up of holiday crafting adventures:
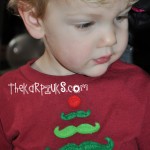
 Mustache Christmas Tree Shirt
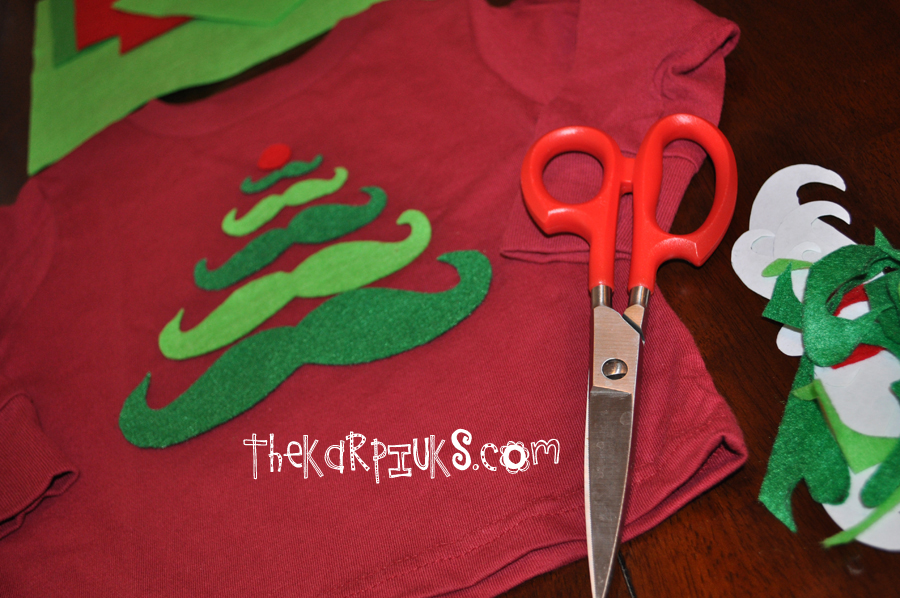
Liam needed a holiday-themed shirt to wear to his Christmas program at school, and with limited notice and not a ton of variety (or opportunities to shop) at the stores, we just made our own. Out came the green felt mustaches! We simply cut mustaches of varying sizes to create the tree shape and used fabric glue to secure them to the shirt. (Don’t forget a piece of cardboard or paper slipped inside the shirt to keep the fabric glue from soaking in and gluing your whole shirt together!) I admit that I was afraid the fabric glue wasn’t going to cut it, so I did bust out the sewing machine and quickly go around each ‘stache to secure them better to the shirt after the glue dried. The shirt was a hit at Liam’s program!
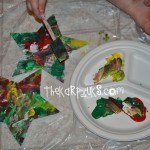
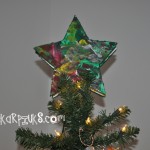
 Star Foam Tree Topper
Next up was a fun painting project where Liam got to decorate two thick star-shaped pieces of foam to make a tree topper. Once the paint had dried, I used a hot glue gun to glue two square wedges of the foam in between the two stars to act as spacers. This made a little space between the front and back star so that I could slip the whole thing over the top branch of the Christmas tree. Simply poke that top branch that sticks up in between the stars and voila – it sat beautifully atop our tree this year. Liam was really proud of “his star” and told everyone multiple times that he made it. There’s nothing like a toddler proud of his art!
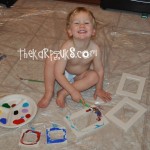
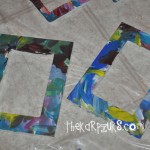
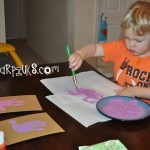
Painted Ceramic Frames
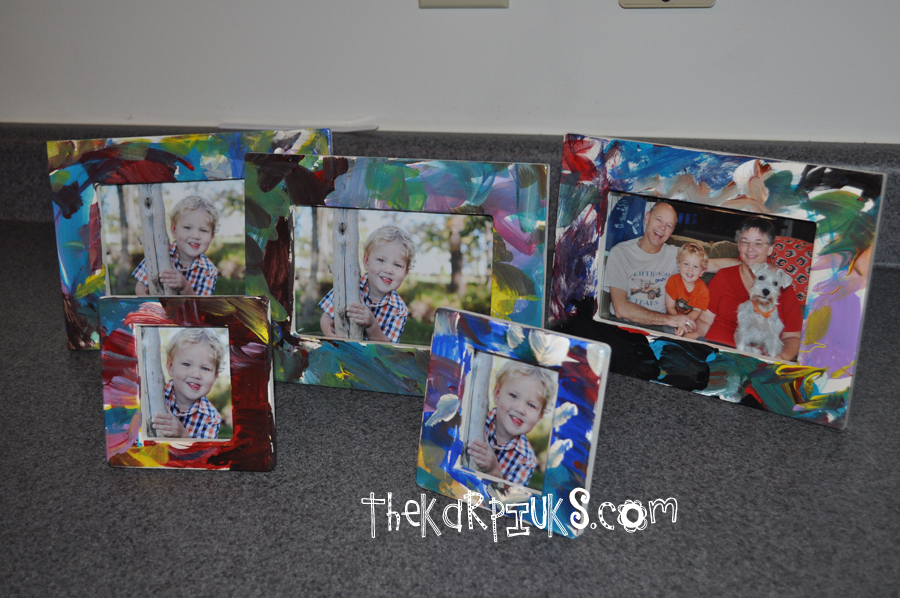
Every fall we take a new round of family photos to use for Christmas cards and to give to family and friends as gifts. This year we had a special picture of Liam that we planned to gift to Liam’s teachers and grandparents, so I ordered a few plain ceramic frames in both 5×7″ and 4×6″ sizes and let Liam paint them however he wanted. We just spread out the plastic drop cloth, gave him a paper plate full of paint and a few brushes, and his only instructions were to paint the frames. This was so much fun, and no two frames looked the same. The frames were a kit I purchased here, and the backing with stand was a separate piece of thick cardboard that I hot glued to the back of the frames once they had dried. Then I could insert the photo. These gifts were a huge hit!
 Canvas Stencil Paintings
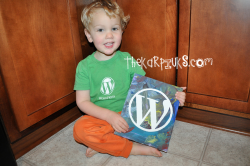
Canvases make great gifts and by using a stencil, I could let Liam go wild with paint and still end up with a specific image, too. The finished result was a clean image in white (since we used white canvases) and Liam’s masterful painting all around it. I plan to do a more thorough write up of this project in the very near future because it really was fun and easy. As you can see, we did two projects using the stencil method: a WordPress logo canvas for daddy for Christmas, and then several different owls in pinks and purples to hang up in baby Lila’s room. Liam LOVED making art for his little sister due next month! He was really proud of these, and I really liked the combination of clean lines and crazy toddler paint. We’re definitely going to have to do more of this style!
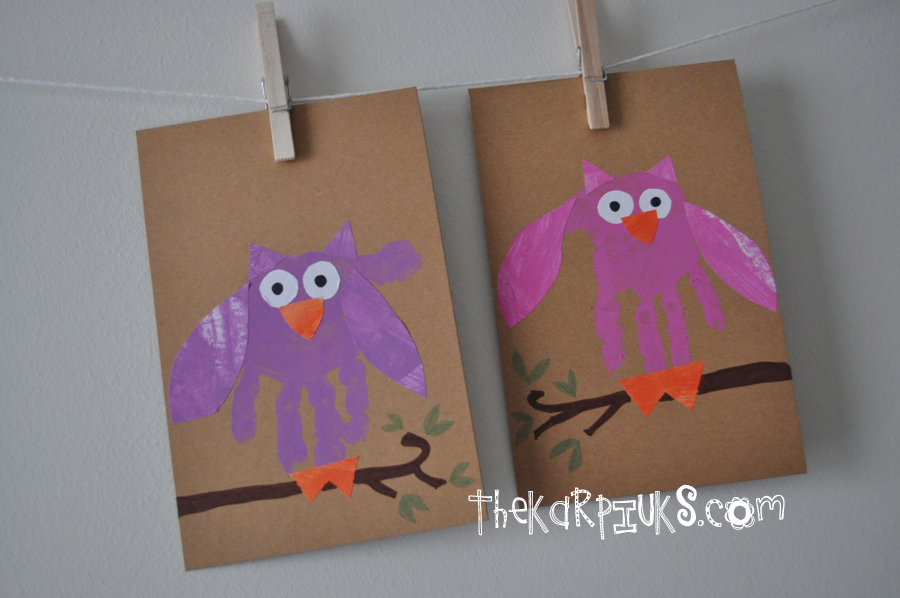 Hand Print Owls
Our most recent project were these cute hand print owl paintings. Again for, you guessed it, decorating Lila’s room. I’m not kidding when I say Liam really gets into art projects and enjoys making things for his “baby Lila.” This is another project that I’m going to do a follow up post about in a bit more depth, but the basic idea is that Liam made hand prints and we decorated them with eyes, ears, wings, a beak, and feet to make the hand prints look like owls. Liam made two, and I added the branches so that they looked like a set that we hung together in her bedroom. I kind of want to make an entire army of hand print owls now.

Whew! We sure enjoy crafting together. Liam received an easel and some watercolor paints, so I see some watercolor pictures (maybe more owls?!) in our very near future, especially since the foot of snow and subzero temperatures has extended our holiday break by at least another day. Be sure to check out the follow up posts for more details on a couple of these projects if you want to see how we did them more specifically. Those will be written up soon! I’d say with clean and organized closets and decor going up in Lila’s room that we’re almost ready for her arrival next month. Here’s hoping!
Happy crafting!
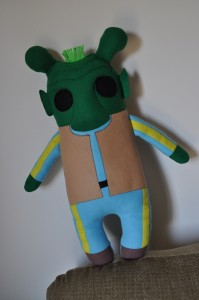
Handmade Plush Greedo Doll
I know, I know. It’s been soap soap soap soap soap for so long that you probably forgot that I got my crafting online start by making plush and purses. (I had almost forgotten, too.) But this past week I went back to my “roots” and the days of crafting plushies in my craft dungeon in Calgary, AB and made something extra special for our son.
I’m a teacher so I don’t normally work in the summer, but my teaching contract has a few summer dates tacked on so that I can run professional development training for other teachers. Since the geekling normally goes to daycare built in to my school district, (which is closed for the summer) we had to find him an alternative daycare to go to for these random days. Every day when I would pick him up at this new place, I’d walk in his classroom and find him loving on this big plush Dora the Explorer doll. He was in love with this thing! He carried Dora everywhere, hugging her tight. It was adorable! Of course, Dora belongs to the daycare, and now that I’m finally off for the summer, that meant no more time with the Dora doll. We could’ve just gone out and bought him his own Dora the Explorer doll, but why buy when you can DIY, amirite?!
So then I started thinking. If I’m going to make my kid a big plush doll… why not give it to him for his upcoming first birthday, which is Star Wars themed? And since the party is Star Wars themed, let’s make the doll a character from Star Wars. Those of you that know me can see why Greedo was my first choice; he’s my favorite Star Wars character. I know, I know, it’s not about me, it’s about the kid. BUT, the geekling is going to be brought up RIGHT and be taught about how Greedo shot first, (George Lucas said so!) so I thought it was a good idea to start with a Greedo plush. Besides… we can then act out fan fiction where Han and Greedo didn’t shoot at each other and instead are BFFs and fly around our living room in the Millennium Falcon we made together. Can you just picture the geekling and his plush Greedo in his Millennium Falcon?! I just melted from the cute.
Anyway, I know it’s been awhile since I’ve gotten out the old sewing machine, but it felt like I had never abandoned it for soap when I got it out this past weekend to stitch together my Greedo doll. Thanks for not holding a grudge, sewing machine. I missed you!
Before I could start sewing, though, I needed a pattern. I tweeted a picture via Instagram two weeks back of a little sketch I did on a scrap of paper as I was formulating my plush plan; it was how I pictured a cute and cuddly Greedo doll to look. After getting the thumbs up from followers, I turned the sketch into a large paper pattern. The kid and I ran out one afternoon and picked up a bunch of fleece and felt, and the rest is history. Greedo came together overnight, and I couldn’t be happier with how he turned out. I love him so much that I’m not sure I want to give him away!
Our finished Greedo plush is 2ft tall (!) and made mostly of super soft fleece with some felt features. Fittingly I left the hole for turning & stuffing in Greedo’s head (hahahaha, see what I did there?) and hand stitched his head closed after stuffing. The nose and eyebrow is all one giant unibrow-nose piece that I sewed separately on the face so that I could lightly stuff it to give his nose and brow a bit of depth. As you can see from the pictures, I cut out the two large full-body shapes completely in the jumpsuit blue fleece and then cut other pieces, like the green head, brown shoes, yellow jumpsuit stripes, and brown vest, and sewed them down to the blue fleece form like pieces of a puzzle in the right spots. Then when I was ready to put Greedo all together, I only had to sew the two large blue jumpsuit pieces, instead of dealing with several different pieces. I hope that made sense. TLDR; I sewed down all of the other parts to the blue body outlines first.
I mentioned pictures – you know I took pictures of the whole process, right? Here they are!
[flickr-gallery mode=”photoset” photoset=”72157630236200242″]
(See the whole set on Flickr)
I seriously cannot wait to gift Greedo to the geekling this next week for his birthday! I hope you like how he turned out as much as I do. :) As a side note, I have lots of Greedo-colored fleece and felt left over, so you never know what other Greedo goodness I may make next! I’m totally thinking hand puppet or a mini lovey blanket…
We Made a Millennium Falcon for our 9 Month Old
 Cross post from our family blog:
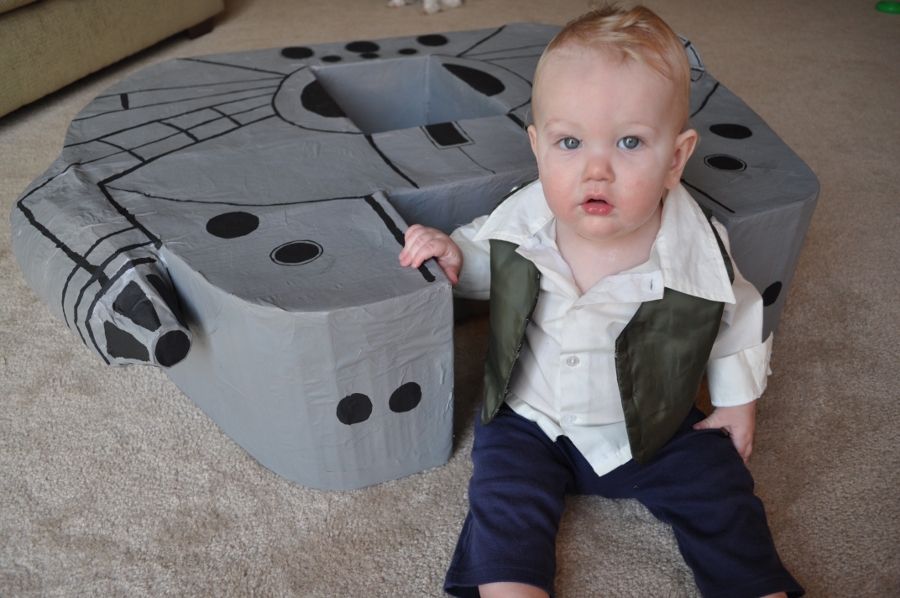
Because what kid DOESN’T need their very own Millennium Falcon?
I rest my case.
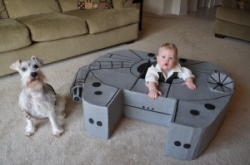
I know it’s April, but this project started back in January and it has just taken that long to find the time to finish. We had bought the geekling this exersaucer thing that came in a huge box shortly after Christmas. Per usual, we put it all together and the kid enjoyed climbing in and on the box more than he did playing with the thing that came in it. This caused Lucas and I to do a lot of reminiscing about our own childhoods, and how much fun it was to make believe with boxes. We pulled out a couple more boxes we had lying around for Liam to play with. It took less than 10 seconds for me to make the jump from pretending one of the boxes was a car to, “How cool would it be to have a Millennium Falcon?” … everyone’s other vehicle, of course.
In no time at all I had formed the body of our Millennium Falcon out of cardboard using the exersaucer box and cutting some additional framework from extra boxes we had stored in the garage from our move back in October. I even had the perfect box to form a geekling-sized cockpit to sit in. We used a lot of packing tape to piece it all together. Then all we had to do was wait for decent weather so I could papier-mâché the whole thing out on the driveway. I’m sure our neighbors thought we were crazy. Or cool, maybe? I’m leaning towards crazy, though.
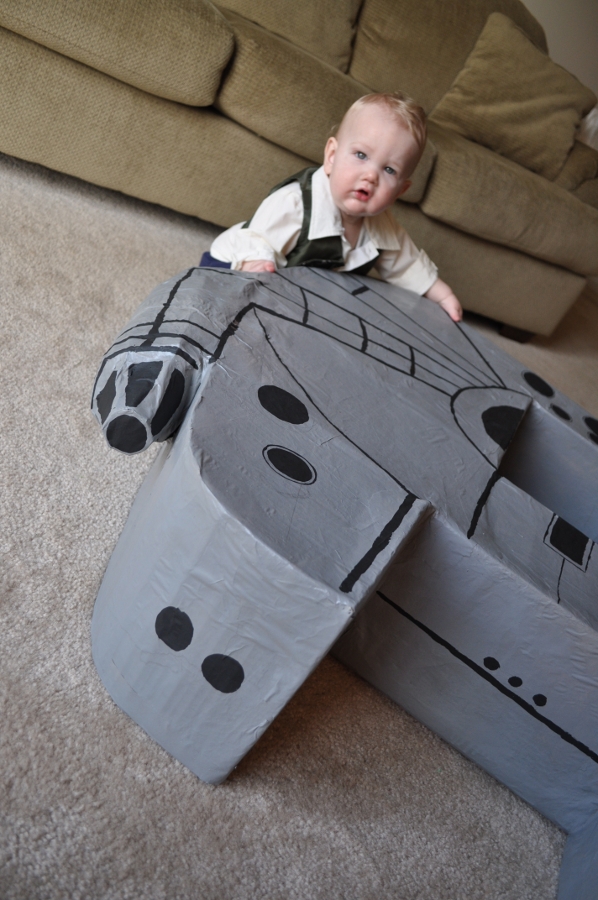
Anyway, fast forward a few more weeks and all of the papier-mâché was thoroughly dry. The Falcon was looking sweet! Then it was time to paint. We picked up some silver spray paint at the hardware store and I then proceeded to destroy the brand new garage floor with it. Hey, at least the paint on the floor is in the shape of the Millennium Falcon, am I right? Besides, that’s what garage floors are for; a constant reminder of how we did stuff in there, plus the shape is like a badge of awesome that makes me smile every time I get out of the car.
Lucas insisted that the Falcon stay out in the garage for awhile after spray painting, and for good reason; it smelled pretty strong. Our little project aired out for over a month. I’d say it was because it needed plenty of time to air out, but in reality, we just got busy. Fast forward now to this week, my spring break. (Perk of being a teacher.) Number two on my Spring Break To Do List was “Finish painting the Millennium Falcon.” Isn’t that on most peoples’ to do lists? Just a typical weeknight for our family. (For those wondering, number one on my Spring Break To Do List was re-hanging 76 pieces of dinosaur artwork in Liam’s nursery. Check!)
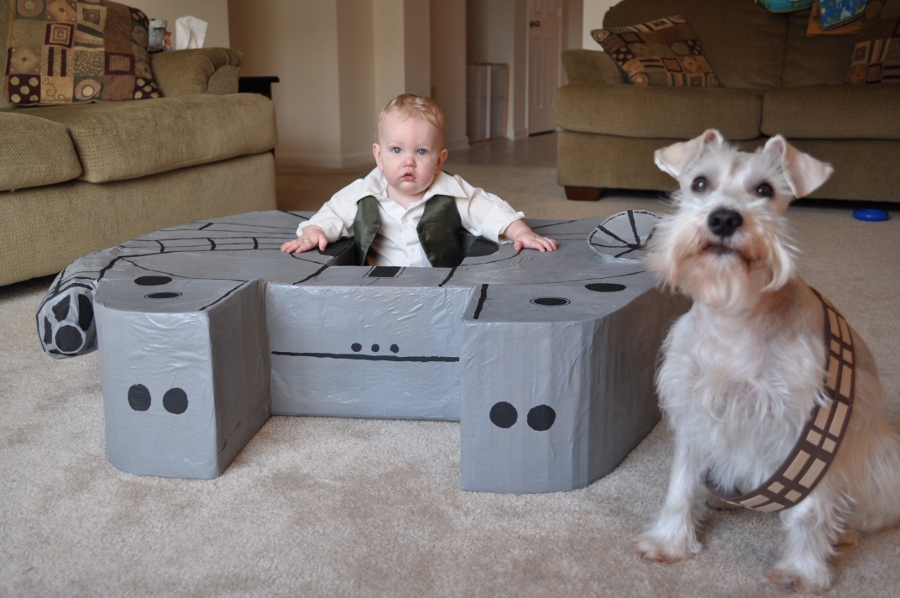
Sure, our Millennium Falcon was satisfactorily silver, but it needed some detail work. I admit I scoured the Internet for good reference material, (I also like that when searching for the Millennium Falcon on Google that I get no less than 70 personal results. That’s because we have so many cool friends with similar interests.) but in the end, I took a lot of artistic liberties with my details. I still think it turned out alright.
For those of you that know us, we tend to take a lot of photographs. Of everything. So you won’t be surprised to find that I took photos all along the way, to document our progress and process in making a Millennium Falcon for our 9 month old son. Because really, how many kids can say they have their very own Millennium Falcon? Mine can’t, but that’s only because he can’t talk yet. But when he can… he’ll be one of a very small number of kids that can say they have their own Millennium Falcon.
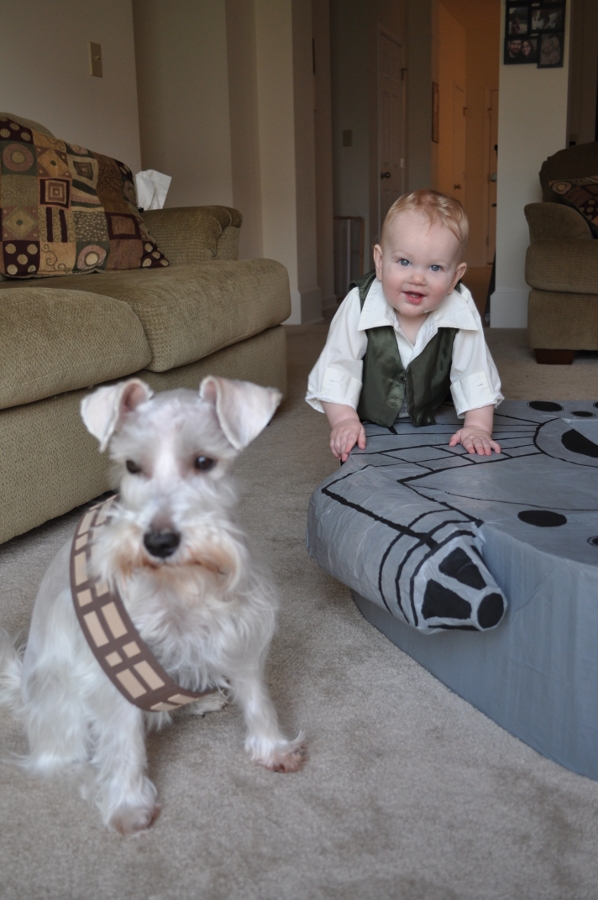
Over breakfast this morning I threw together a bandolier for the Schnauzer out of craft foam. He makes a pretty convincing albino wookiee sidekick, amirite?
For the full gallery of 47 fun photos including more cuteness than you can stand + all of the process photos, check out our Flickr gallery here: We Made the Millennium Falcon. The photos go in order to show you how the project progressed.
Update: Operation Geekling Dinosaur Project
 It’s been over a month since our call for submissions went out about dinosaur art for our geekling’s nursery wall, and in that time, we’ve received so many amazingly fantastic pieces of dino artwork from all over the world! I thought I’d take a moment to show you how it’s going and update you on the project’s progress.
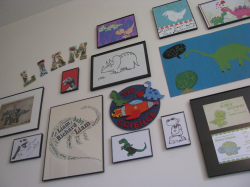
Last weekend we went out and bought the first round of frames for the artwork we’d received so far and began hanging it on the wall. Call me crazy, but we have around 8 weeks left and suddenly it seems SO CLOSE, and somehow, hanging dinosaur art on the nursery walls helped me to feel like we were being productive towards getting “ready” for baby.
I posted the updated photos online to a special Flickr gallery we’ve created for the project when I finished, and shared the project’s progress on Twitter. @ThinkGeek, who gave us a shout out on Twitter the first time the call for submissions went out, posted about our project for us again on Twitter this past week, (thank you!) and suddenly a whole slew of new submissions came rolling in fast. So fast, we had to run out to get more frames just to keep up! Here is a quick look at the gallery; the photos go in order from the first inspirational piece by Katie Doyle that gave us the idea in the first place, to where we are today. The order tells a story of the things we’ve been sent and the stages of hanging to show the wall’s growth over time so you can see the project’s progress. As of today, we’re currently on “Stage 2″ of hanging art.
[flickr-gallery mode=”photoset” photoset=”72157626280396088″]
Are you feeling the warm and fuzzies like we are? I am so in love with the way the dino wall is turning out it gets me all teary-eyed. I can’t help but gaze at it when I’m in the room and reflect on just how many different people are involved and the level of kindness involved to make the wall a success. It’s somewhat of a “mural”, but every piece is by a different person and no two pieces are the same, so the wall seems to have this personality all its own. It’s exactly what I pictured in my head when the idea came to me, which gets me all sappy; even more so as your stereotypical emotional pregnant woman. Truly, thank you from the bottom of our hearts. We now have not a single piece of art by one person, but a large collection created by many that comes together as one cohesive and stunning piece of artwork that means so much to us.THANK YOU! Whether you mailed us something or emailed us a digital piece to print, every single submission has filled us with joy. Every piece has added its own personality to the wall, and we can’t wait to explain the making of the dino wall to our geekling as he grows up surrounded by its awesome.
I’ve been asked a few times about a “deadline” on this project. Baby Liam is due June 29, but truthfully there’s no real deadline; we’re always up for adding more to the nursery’s dino wall. (Find out how you can contribute, here!) As I mentioned in the original call for submissions post, I even picture myself one day sitting on the floor with Liam and a box of crayons or finger paints making dinosaurs to add to the wall ourselves. The best part is that the core of the project started with all of you, and will continue to build out from there over the years. We are so appreciative of everyone’s generosity; thank you for taking the time to add to our project! We’ll continue to update the official gallery as new rounds of artwork are submitted and added. Credit to the appropriate people, whether by name, Twitter handle, or link to their websites or Deviant Art sites will be in the description for each photo in the gallery, so please be sure to go and check them out! Digital art posted to our gallery with credited link to the artist’s site were posted there with permission. Those of you that submitted something to us via snail mail should have received (or will be soon receiving) a thank you card that I made, and a little sketch in thanks to reciprocate the love. If you’ve sent us something digitally, I will be emailing you back a digital version with a note in thanks as well. I really can’t thank you all enough, though!
Want to contribute? Check out the details here!
The Official Operation Geekling Dinosaur Project Gallery
In other somewhat-related news, Lucas and I are doing the March for Babies next weekend with my 8 month baby belly on May 7, 2011. It seems fitting that we’re doing a walk to raise money for babies with my baby belly on Mother’s Day weekend, no? It’s a 2 mile walk and I’m really looking forward to it; helping to raise healthy babies and support premature babies who need the right start hits close to home, and is such an important cause. Read all about our progress here! (And hey, if you’re in the area and want to join Team Karpiuk on May 7, please let us know!) Thanks for your support :)
Lots of love,
Lucas, Lesley, and Liam (the geekling) – aka @thekarpiuks on Twitter (or as some of you know me, @geeksoap or@thepinktoque)
Call for Submissions: Operation Geekling Dinosaur Project
 So I had this crazy idea. (And this crazy idea is a cross post from our personal blog, by the way.)
It may have a huge turnout, it may flop. But no matter what happens, I think it would be a really cool way to decorate a room.
In this case, I was thinking about the geekling’s room and how to decorate it. Our “theme” is dinosaurs, but we are renting right now so painting is out of the question. That means the décor is dependent on the wall hangings. Last week our friend @katiedoyle mailed us a painting she did of a dinosaur for us to hang in the geekling’s room. (That’s her artwork pictured!) Inspired by this fantastic piece of original artwork made with love, I started to think… wouldn’t it be cool if ALL of our friends and family each made us some kind of dinosaur art for the wall?
I then had this amazing vision of one entire wall of the room covered in dinosaur artwork, all by different people in our lives. And not just one kind of artwork, but dinosaurs made from all different kinds of mediums, too. Some dinosaurs were painted, some were sketches, some were prints, some were done in colored pencils or crayons, and some were dinosaurs composed of fabric shapes.
The wall was covered in this variety of dinosaur artwork, but the pieces weren’t all the same size or orientation, either. Some of the pieces were landscape, some were portrait, some were large and some were small. They were arranged in a fun way like puzzle pieces on the wall, not in straight and perfect rows. Each piece was in the same simple black frame to tie everything together.
It was beautiful, and that’s when Operation Geekling Dinosaur Project was born. And for it to be successful, I need YOUR help.
How can you get involved and help? Make us a dinosaur for the wall! You don’t have to be an “artist” or even feel like you know how to draw to get involved. All forms of art are appreciated and beautiful! You can use any medium or style you like and feel most comfortable working with, even if it means you print out a dinosaur and color it with your Crayolas. Pick your favorite dinosaur or do a scene of several dinosaurs; it’s all up to you. The only stipulation is that you work in a size that can easily be framed, since I’ll be tasked with trying to get the same style of frame for all of the artwork. The collection together would form a mural of sorts, except this mural would be made up of individual pieces of awesome from awesome individuals.
I may only have 5 people take this on or we may have none, and that’s ok. I’m still going to try! I’d ideally love to have as many people involved as possible. You don’t have to use any fancy paper or canvas or anything like that; plain paper will do. I’ll be throwing it into a frame anyway! I just think it would be amazing to have a wall full of dinosaurs in all different styles to represent all of the different people in our lives. And if you sign your artwork somewhere we’d have a lasting memory of who made each piece to share with the geekling as he gets older.
As artwork comes in (if anyone decides to participate), I plan to photograph it individually and post it to a special Flickr gallery with credit to the artist so that their part of the project can be shared. I’d like to keep a photo journal throughout the project’s progress, including photos of the finished result, too.
And maybe over the years new pieces can be added; I imagine the geekling and I in a few years spending a rainy day with finger paints or crayons making new dinosaurs to add to the wall. But the core… the heart of the project begins with all of you and builds from there. How special and how meaningful would a wall full of dinosaurs made by people we know be?! And your artwork would forever brighten the room of one special little boy, who will grow up surrounded by your original creations and learn from an early age to appreciate art and the value of handmade.
I’m starting to get sappy here, but if you’re interested in donating a piece of dinosaur artwork in any medium, big or small, to our project, we’d love to have it and frame it and hang it and share it with our geekling and the world. Your contribution would be one piece in a unique collection to make the décor in the geekling’s room grand and special. I will personally draw a little something in return and mail it with a thank you note to every single person who contributes, in addition to posting you and your piece in our Flickr gallery and sharing it on Twitter and here on my craft blog for all to see.
So the Call for Submissions is officially open; let me just say thank you in advance to anyone who participates in our project. I truly appreciate the time and effort put in to make something for someone else. Long live handmade and long live art! <3
love,
Lucas, Lesley, and the geekling (Liam)
- Want to Contribute?
- Email us if you need to snag a mailing address
- Common sizes for framing:
- 24 x 36
- 20 x 30
- 18 x 24
- 11 x 17
- 8.5 x 11
- 8 x 10
- 5 x 7
- 4 x 6
Thank you! <3