Free Pattern: Scalloped Baby Blanket
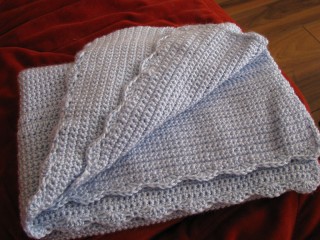
I’ve finally completed it: a scalloped edge baby blanket for our friends Kali and Caley, who are expecting their first baby (a boy) sometime in January. Â I just learned crochet about a month ago, so this was a very ambitious project for me! Â I tried to make everything as simple as possible so I created my own pattern that would be elegant, and yet also allow me to really practice those basic crochet stitches. I added the scalloped border to be “wild” because I was feeling confident. Â Now that I’ve completed a baby blanket, I can do anything! Â It took me a month to do, but I was only putting in a few hours or so here and there (maybe once a week?) and taking my time. Â This could easily be done in a weekend if you are a veteran crocheter. Â So enough jabbering, here’s the pattern! (And please be kind, it’s my first time writing a crochet pattern!)
The Ckalieys’ Scalloped Baby Blanket
Materials
- 3 skeins (1365 yards/15 oz) Bernat Softee Baby Solids in Pale Blue
- US H/8-5.00mm crochet hook
Notes
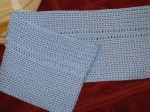
This blanket is built body first, then the scalloped top and bottom edges are done afterwards. Â The body has a simple pattern that even the newest crocheter can handle!
Stitches/Abbreviations Used
sc = single crochet
dc = double crochet
ch = chain
st = stitch
Shell Stitch (described below)
Instructions
Body
ch 110
row 1: sc in second chain from hook, sc in each st across (109 sts)
rows 2 – 20: ch 1, sc in each st across (109)
[The “decorative pattern”]
row 21: ch 2, dc in each st across (109)
row 22: ch 1, sc in each st across (109)
row 23: ch 2, dc in each st across (109)
You will alternate between doing 20 rows of sc and then the three rows that make up “the decorative pattern” until the blanket is as long as you want it to be.
Basic Pattern Idea
*20 rows of sc
(ch2) 1 row of dc
(ch1) 1 row of sc
(ch2) 1 row of dc*
Repeat from * to * until you reach your desired length. I went around 34″ or so. Since you start with 20 rows of sc, make sure you end with a completion of a group of 20 rows of sc to make it look even. (So don’t end with the dc/sc/dc pattern.)
Border
Once the body of the blanket is the length you want, you’re going to immediately turn your work and do the shell stitch back across that final row.
Shell Stitch
*Skip 2 ch, dc 5 times in the third ch : skip 2 ch, sc in the third ch* across (18 shells)
Once you have completed your last shell stitch, you’ll now turn your work clockwise and slip stitch down the long side of the blanket to get to the opposite end. Â Once you get there, turn your work again clockwise and you’ll see you’re at the opposite long end of the blanket. Â Your first set of shell stitches should be on the furthest end from you. Now shell stitch across this bottom row. You now have shell scallops at the two farthest ends of the blanket. Â Turn your work clockwise one final time and slip stitch up the long side until you reach your initial shell. Â You should have made a complete square trip around the outer edge of your blanket, giving the two furthest ends from each other a pretty scalloped edge and slip stitching the two longest sides.
Fasten off and weave in all ends. Â Tada!
Bernat Softee Baby is machine washable and dryable. Instructions:
Machine Washing and Drying: Wash in water (not exceeding 40°C/104°F) at permanent press setting. Do not bleach. Tumble dry at low heat, at delicate setting. Do not iron or press. Do not dry-clean.
Good luck! :) And if anything is unclear or I’ve made a mistake, please let me know, since as I mentioned, it’s my first time ever writing up a crochet pattern. Â If you make any scalloped edge baby blankets, I’d LOVE to see them! Â Drop me a line at craftblog at pinktoque dot com so I can feature you. :)
Score!
Last week I received an email from Michaels with a make-your-own-50%-off-sale coupon (as did everyone else on their mailing list) and Lucas treated me to a shopping spree on Saturday. Wow am I a lucky girl! I used the 50% off coupon on something I’ve needed for a long time … a knitting bag. I’ve been pining for one of the Ravelry totes but it’s on my Christmas list. The fact that I needed something useful for carrying my WIPs around became very apparent this past Thursday when the first official meeting of the SE Calgary Knit & Crochet group took place. We organized on Ravelry. It started with me looking on the Calgary discussion board for any groups that were already meeting way down in the SE. It turned out that there weren’t any, so once it became apparent that there were several showing real interest in the idea, we just decided to make our own. We met at a local Starbucks and it was really great! There were four of us total with one other confirmed to be there next month along with a possible sixth member, too. It was a great way to meet and get to know
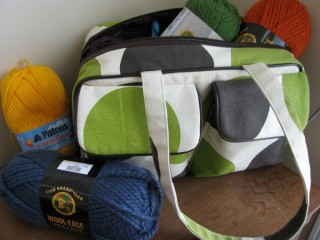
each other. As I was getting ready for my first knit-and-crochet-in-public social event, I realized I was carrying my current WIP (a baby blanket for the Ckalieys) around in a Safeway bag. Sad. I managed to scrounge up something for Thursday but I was elated to pick up a real knitting travel bag at Michaels with my coupon and it’s so handy! Just look how pretty!
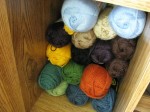
And that’s not all I got at Michaels. I’ve been carrying around a tattered yarn wish (read: need) list in my purse for all the yarn required to make the Christmas gift items on my to do list this season. Most of it was on sale and so I picked up more yarn in that one trip than I’ve bought over the last several months combined. Needless to say, it was an exciting day :) Just look at all of that luscious yarn!
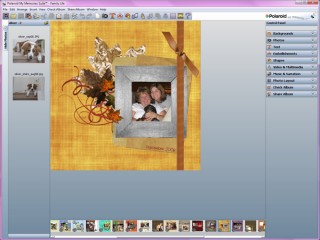
I’ve got several digital scrapping freebies ready to give away (I’m glad everyone liked the CU paper edgers from yesterday!) but also on the horizon are some tutorials for working with the My Memories Suite digital scrapbooking software I use. I’ve gotten a few emails lately from users asking about its features after they read my review, and now that I’ve had the software for nearly a year and have been using it extensively, I think some tutorials would be a great idea. Inspired by an email I got today, I’m already working on a basic features intro and a tips and tricks for layering paper tutorial. I know it won’t be of much use to those of you who don’t use My Memories Suite, but perhaps the free videos will inspire you and get you excited enough about the software that you’ll want to pick it up for yourself! :) I really can’t rave enough about it.
So that’s what’s new on the crafting front. See you back here soon for more freebies later in the week and some software tutorials. And with all of that great yarn I just got, you can be sure there will be some more WIPs to share in the very near future :) Have a great week! :heart:
